

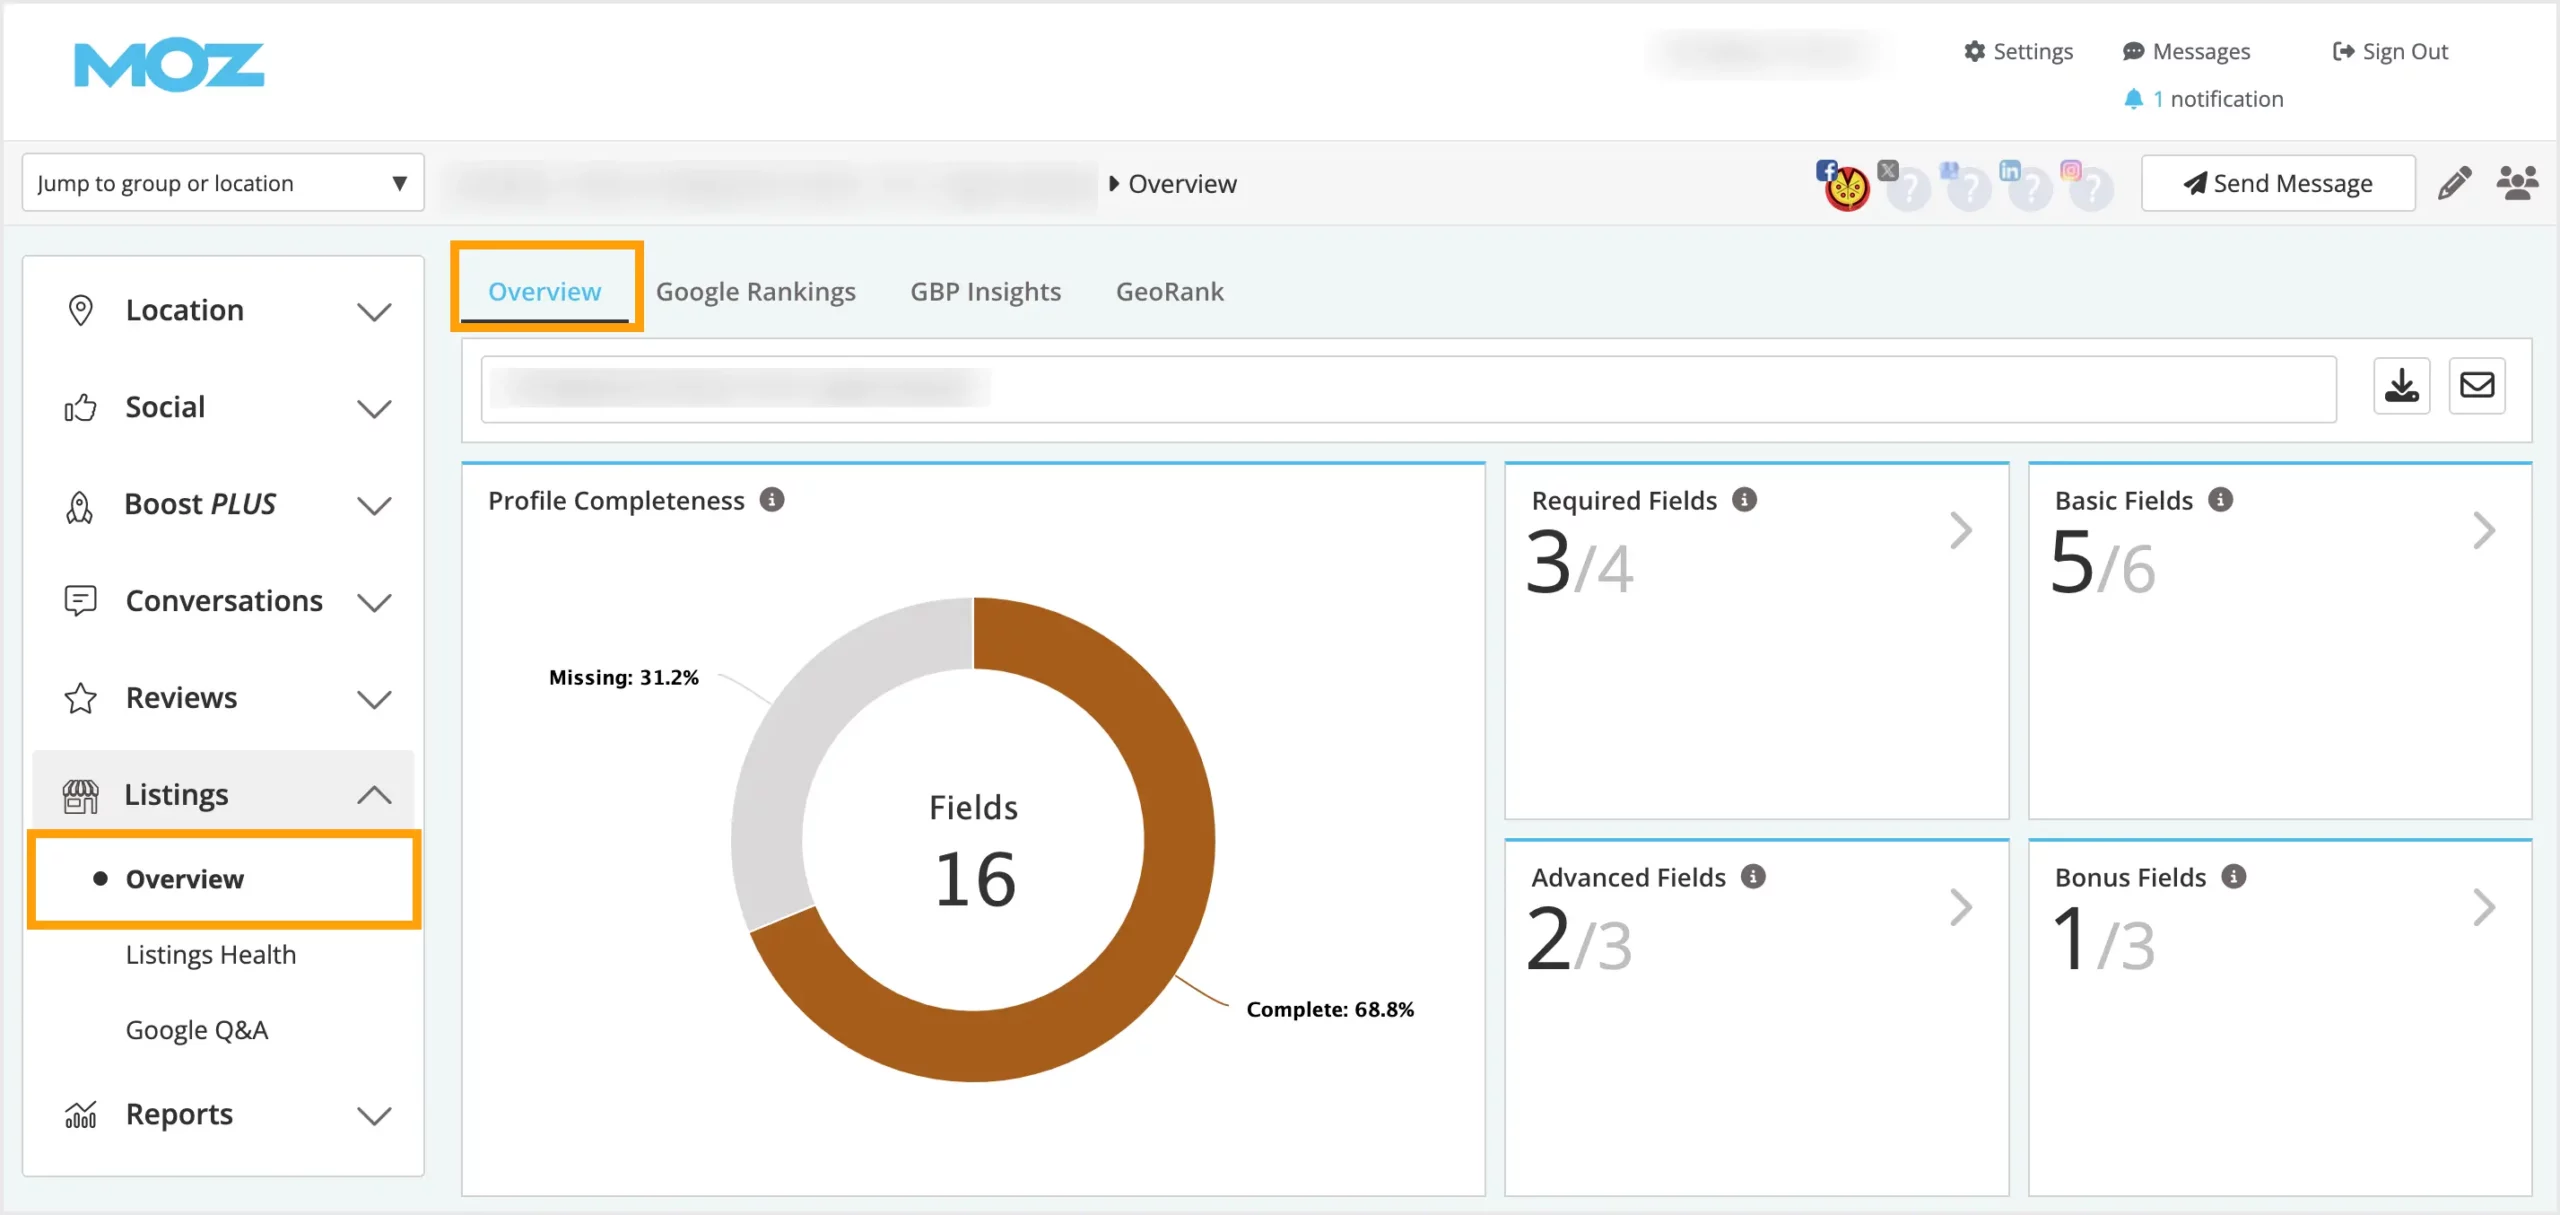
Search Atlas goes beyond Yext's business listing management by adding AI automation, local rank tracking, and competitive analysis in one platform. While Yext helps large companies keep their information consistent across directories and search engines, Search Atlas focuses on local SEO growth for agencies and multi-location businesses.
Yext organizes content through its Knowledge Graph for enterprise search, but Search Atlas tracks local rankings, analyzes competitors, and optimizes Google Business Profiles directly. OTTO SEO automates GBP posts, review responses, business updates, and structured data across hundreds of listings—doing more than Yext's basic directory sync.
This guide shows you how to move from Yext to Search Atlas, set up local keyword tracking, use OTTO SEO for GBP automation, build citations, and create client reports that show local search results, not just listing accuracy.
1. How to Import Local SEO Data and Set Up GBP Project in Search Atlas
Yext’s doesn't have a typical rank tracker so you need to set up ranking data in Search Atlas from scratch. However, you can download some info from Yext for historical reference.
From Yext
Export your performance data by going to the Account Dashboard, clicking on Export in the upper right corner, and choosing between your options.

In Yext, go to Knowledge Graph > Entities, select the entities you want to export using the checkboxes (or leave unselected to export all), then click More Actions > Export Entities. Download this export data, as it may contain useful information, though Search Atlas’s Knowledge Graph requires less manual work due to its automation features.

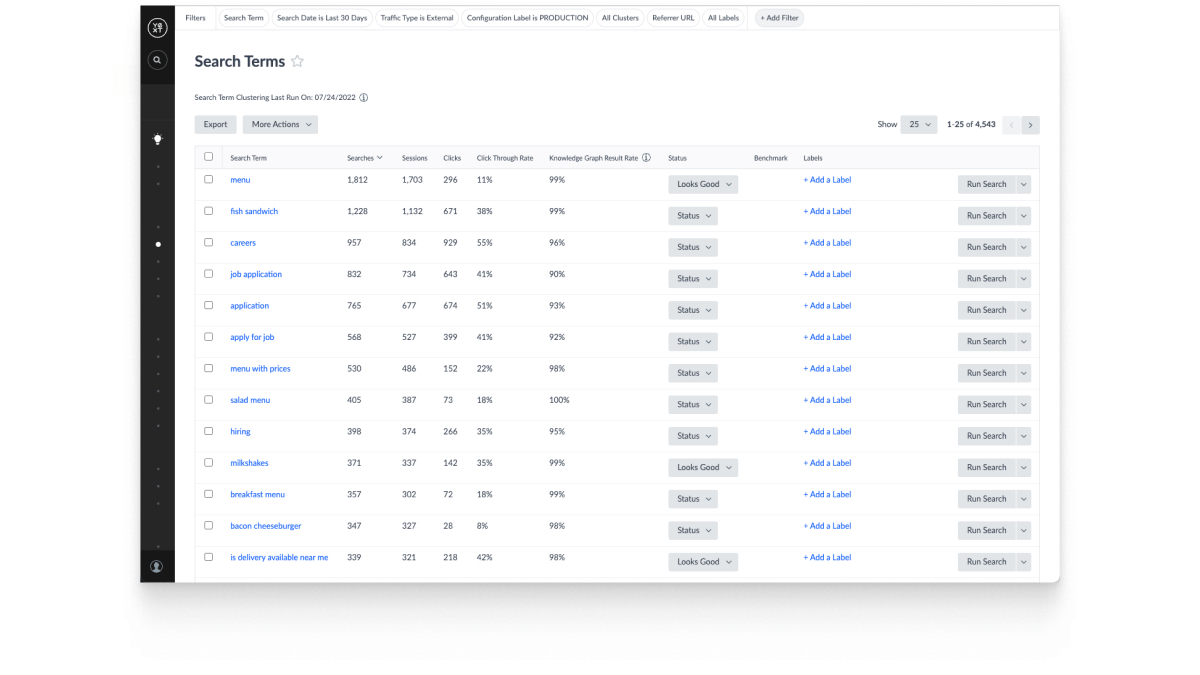
You can export the Search Terms valuable to your future local campaigns. Go to Search Terms, choose your filters, select some or all, and click Export on the upper left.
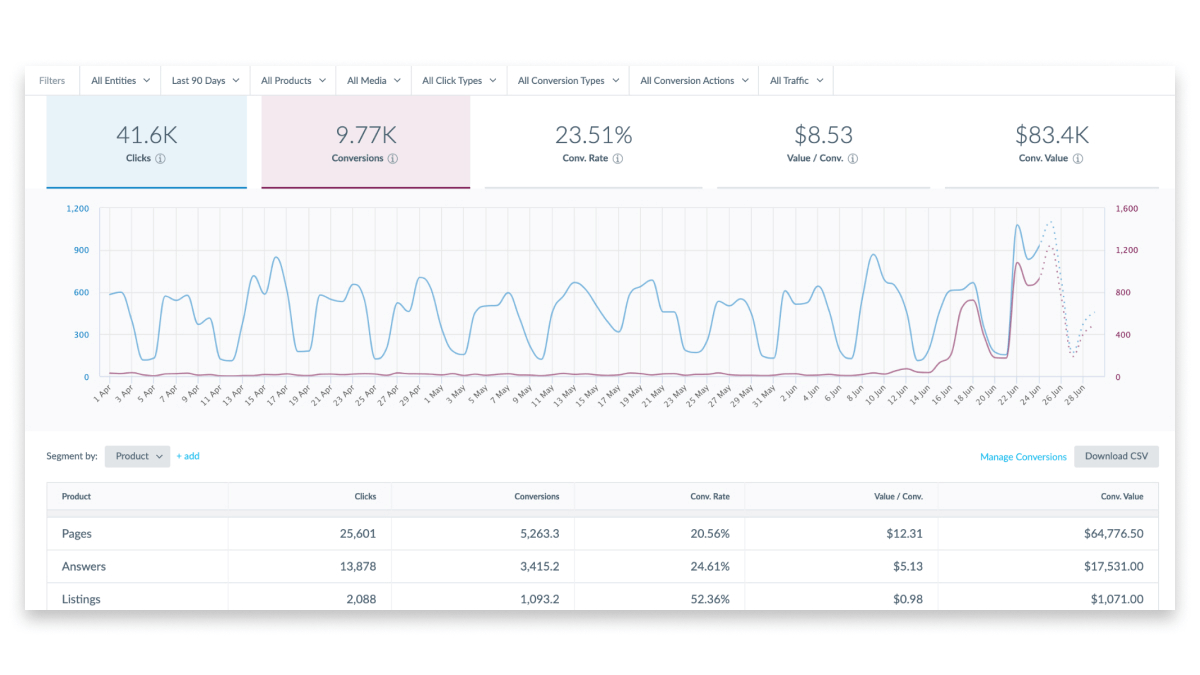
In the Analytics dashboard, choose filters and values and click Download CSV.
In Search Atlas
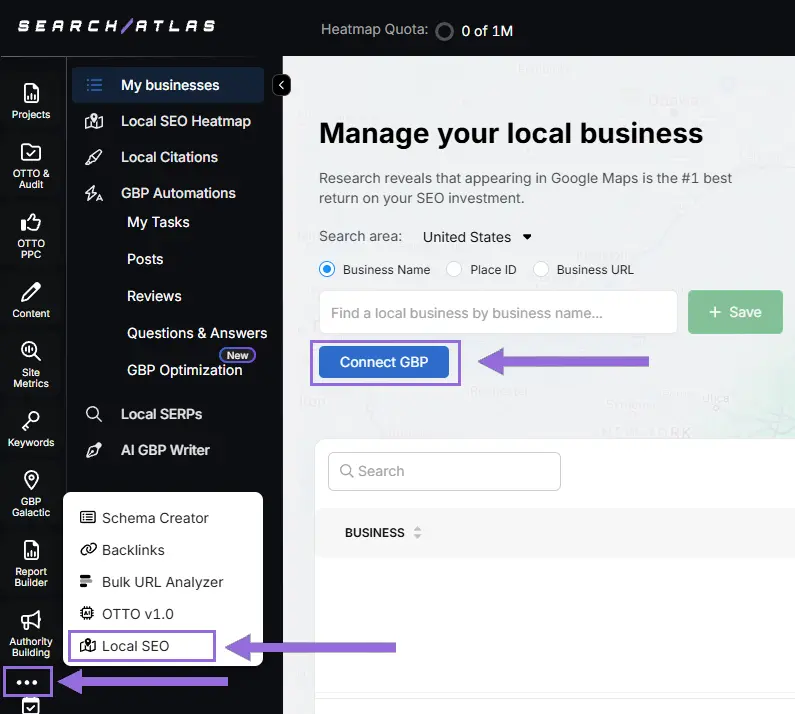
Go to Local SEO > Connect GBP, and link your verified listing.
Authorize access and connect your verified property.
Select your Business
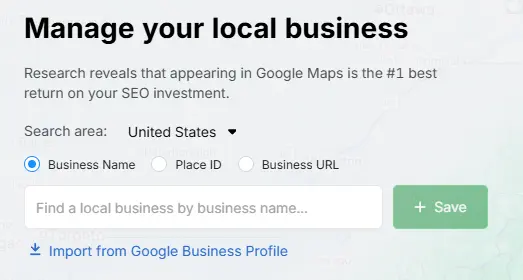
Search by business name, Place ID, business URL, or import via email invitation.
Click + Save to create your local SEO project.
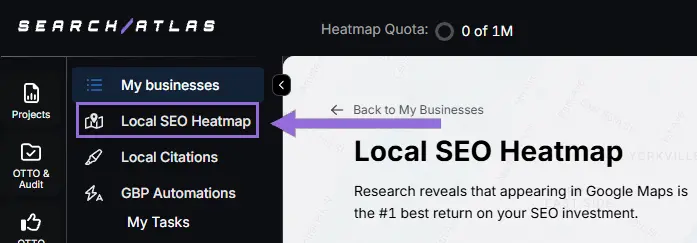
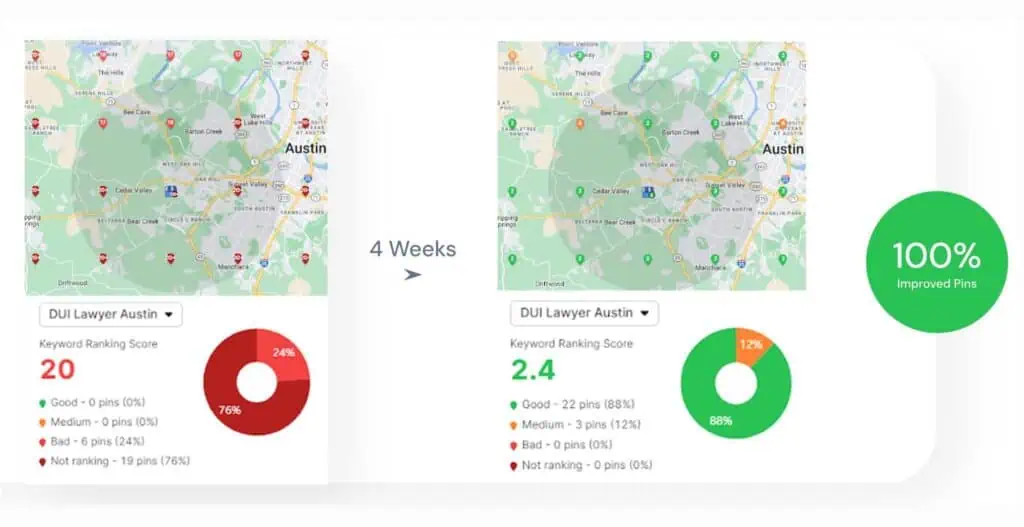
Configure the Heatmap
After GBP is connected and the project saved, go to Local SEO > Local SEO Heatmap.
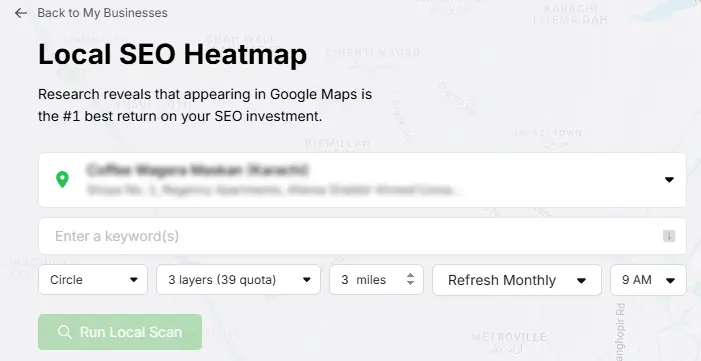
Add the keywords that are going to be tracked, choose between circle or rectangle to define the tracking area, and set the radius. We recommend:
- 3–5 miles → Use 3 layers or grids
- 10–25 miles → Use 4–5 layers or grids
The bigger the mile radius, the more layers or grids you should use. This recommendation increases grid density for wider coverage.
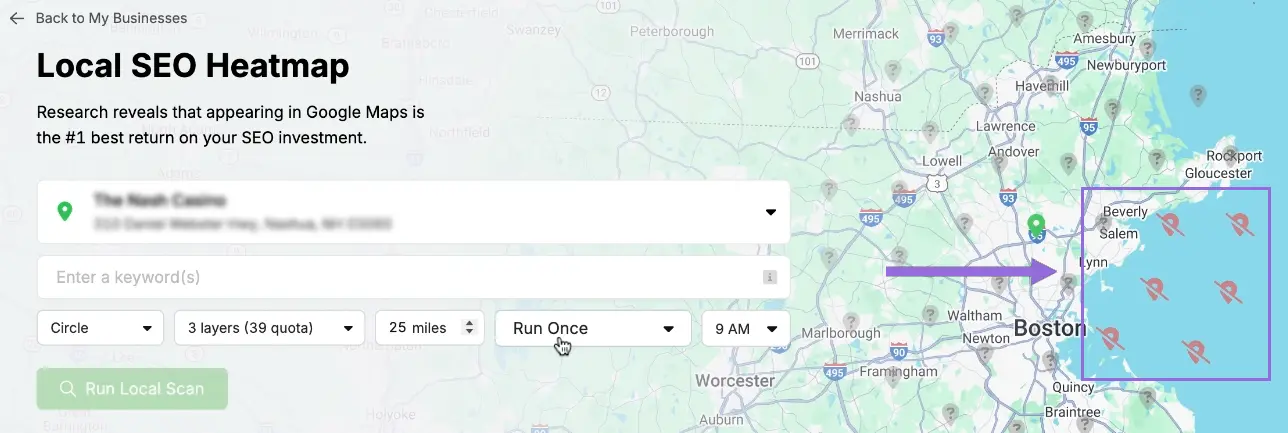
Schedule refresh intervals and choose specific times when your business is open. Avoid midnight or off-hours, as it may show lower ranks than actual performance.
Click on the pins to omit unnecessary ones (e.g., uninhabited areas) to save quota and avoid skewed average ranks.
Editing Existing Reports
Click on an existing project and click on the top of the page.
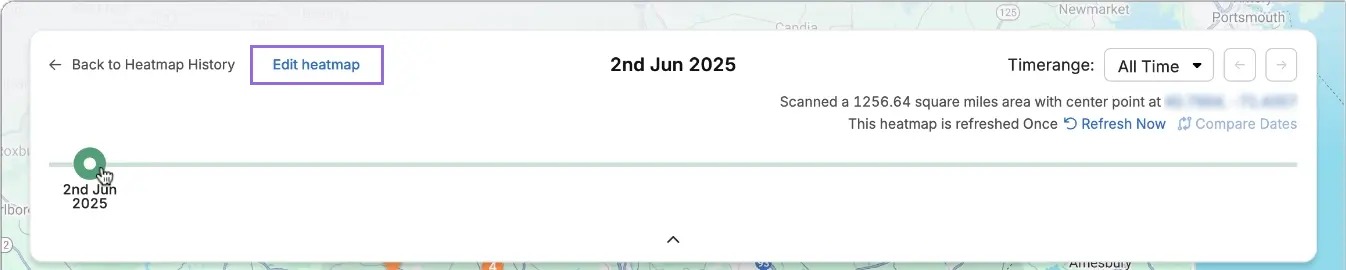
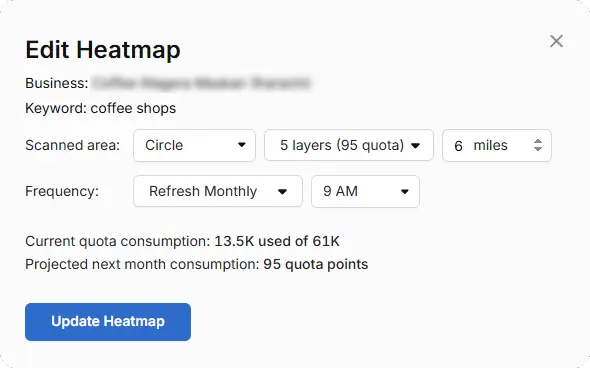
A timeline will be available to check the progress of the rankings over time. Click on Edit heatmap and you will be able to change all of the configuration.
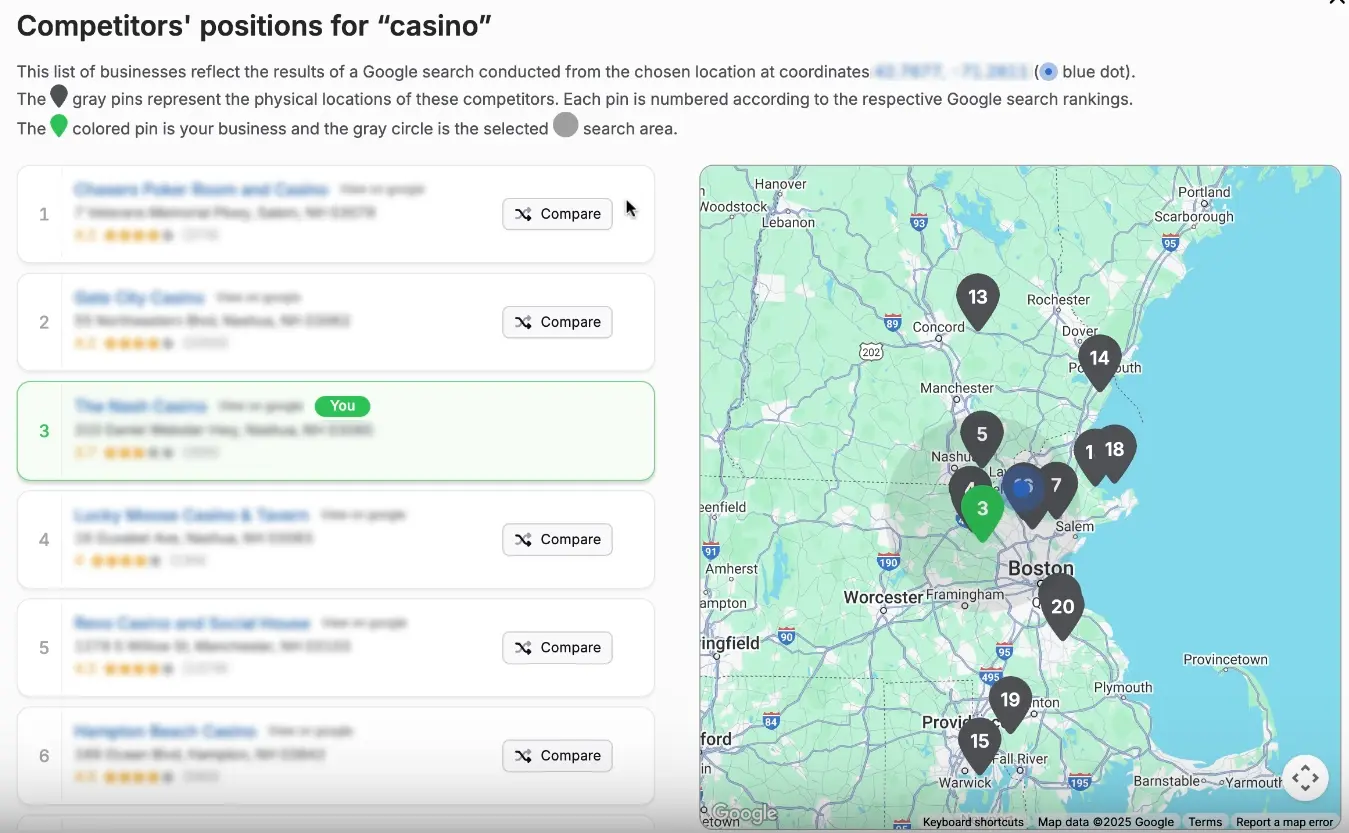
Compare Competitors
It’s possible to analyze how the business compares its rankings against each competitor in the area. Click on an individual pin you want to target.

A list of local competitors will pop up for the same keyword and pin. Click on Compare to choose which one you want to compare.
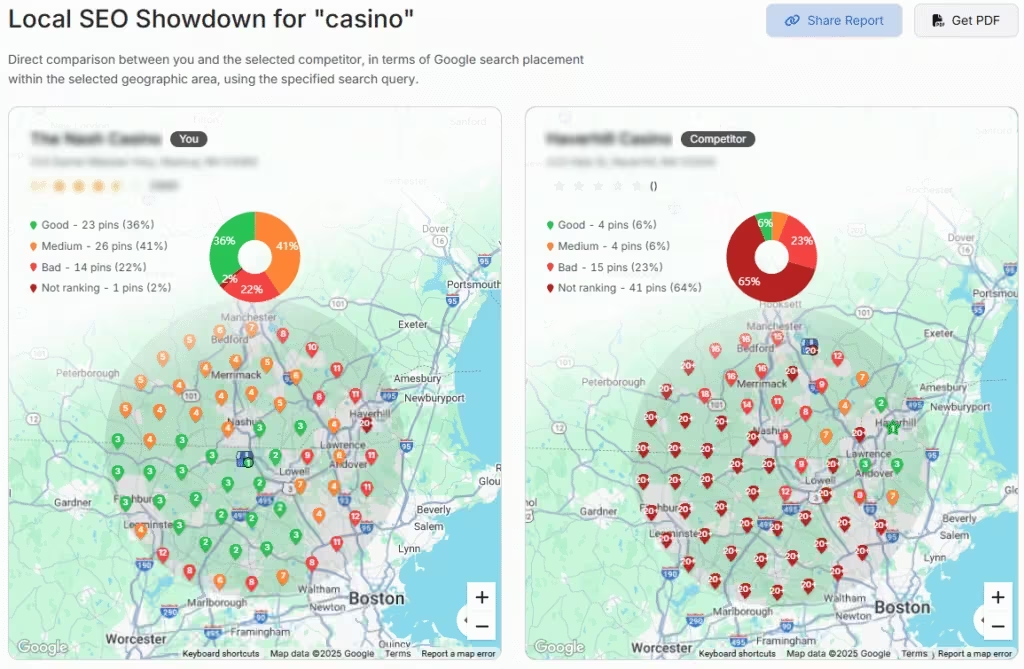
Your business and the selected competitor will be compared side by side. You can freely move the camera, zoom out, and zoom in to analyze all of the region.
Set Up Local Rank Tracker
Go to Keywords > Keyword Rank Tracker
Enter the business’s website or target page, select the exact location being targeted, and click on Start Tracking.
Set device preference, language, frequency, custom naming, and description of campaigns or views.
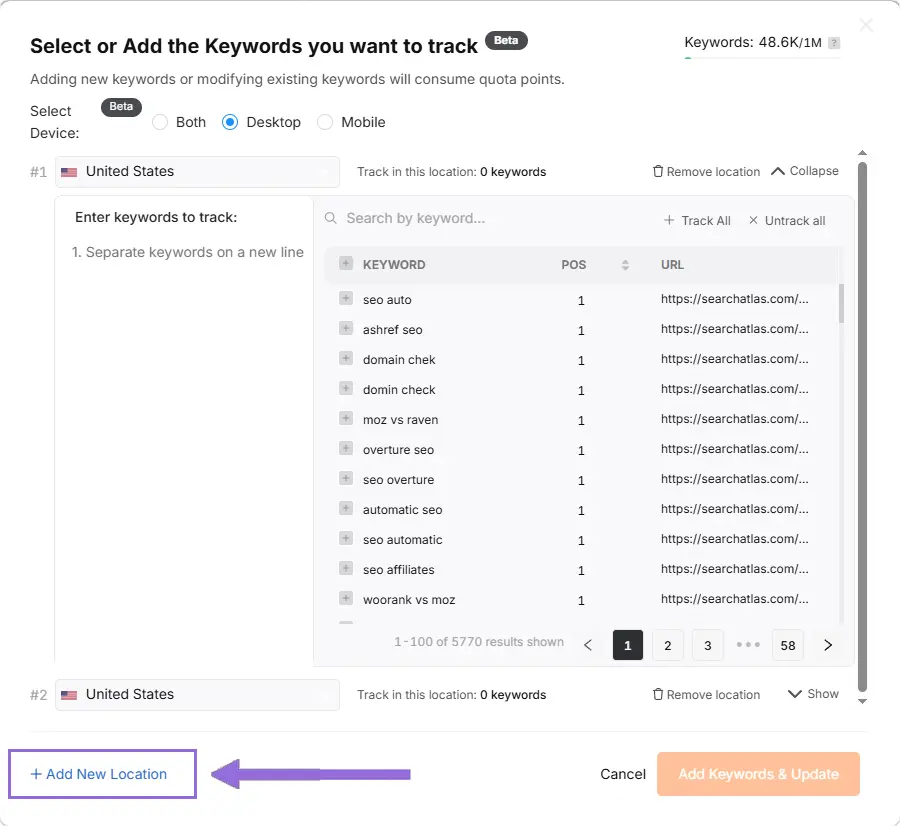
Enter the keywords you want to track.
Add Multiple Locations
If you have multiple businesses for the same project, click + Add New Location to track keywords for multiple locations in one report (e.g., Las Vegas and New York) and assign different keyword sets to each.
2. Setting Up Local Citation Building
Search Atlas offers a powerful tool for building local citations by submitting your business data to the 5 major data aggregator networks. This is a one-time process paid for with Hyperdrive credits, not a recurring subscription.
From Yext
Search Atlas uses automated listing, so you don’t have to import any data. Still, it might be useful in the future.
In Yext, go to Listings > All Listings, select the listings you want to export (use filters or checkboxes to select specific ones, or check Select All for everything), then click the Download icon. The export will be prepared in a new tab—click Download when ready.
In Search Atlas
Go to Dashboard > GBP Galactic or Local SEO > Local Citations
Select the desired business name from the dropdown menu. Ensure the correct Google Business Profile is linked.
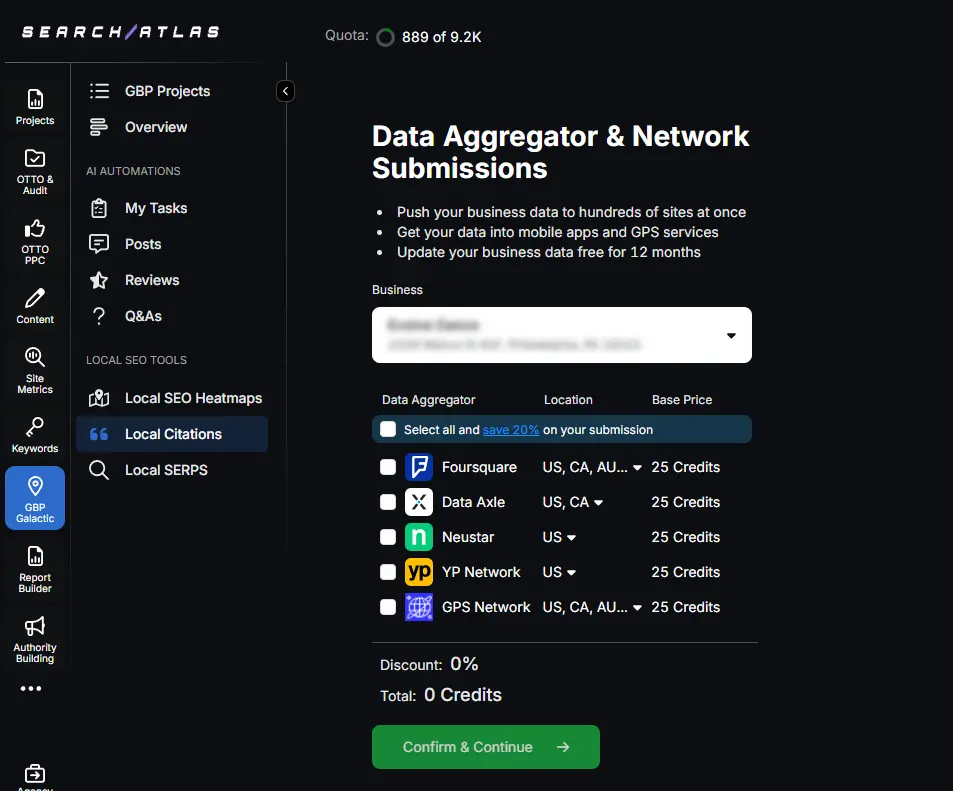
Choose the Data Aggregator Network(s) you want to submit to. The options are Data Axle, Foursquare, Neustar Localeze, Yellow Pages Network, and GPS Network.
Click the three dots to review the pre-filled business details and provide any additional details required.
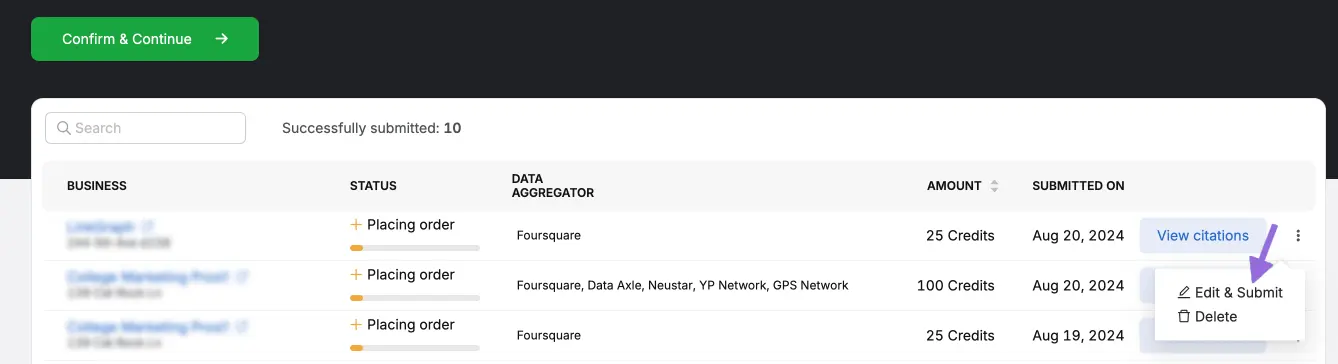
Click Submit to finalize the process.
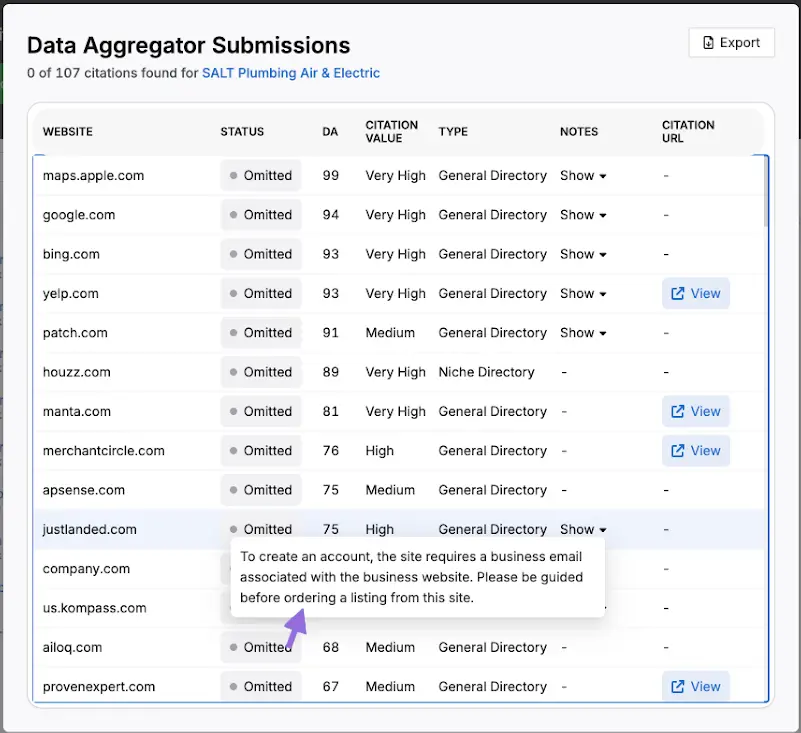
The data will begin to appear on the Citation Listing screen.
Post-Submission
The process spans approximately 40–45 days, depending on the aggregators. You can update submitted details later for free if needed.
A complete report with live and updated citations will be available after four weeks.
3. How to Enable Automated SEO Optimization in Search Atlas?
Localo doesn’t offer an AI SEO agent to automate Local SEO tasks.
With Search Atlas, you can set up OTTO SEO, the AI agent that automates nearly every SEO task, including technical audits, on-page optimization, link building, content creation and optimization, Local SEO and GBP optimization, and more.
Obs: It’s necessary to go through the Site Audit on your project before activating OTTO.
Go to Projects > + Add a Website
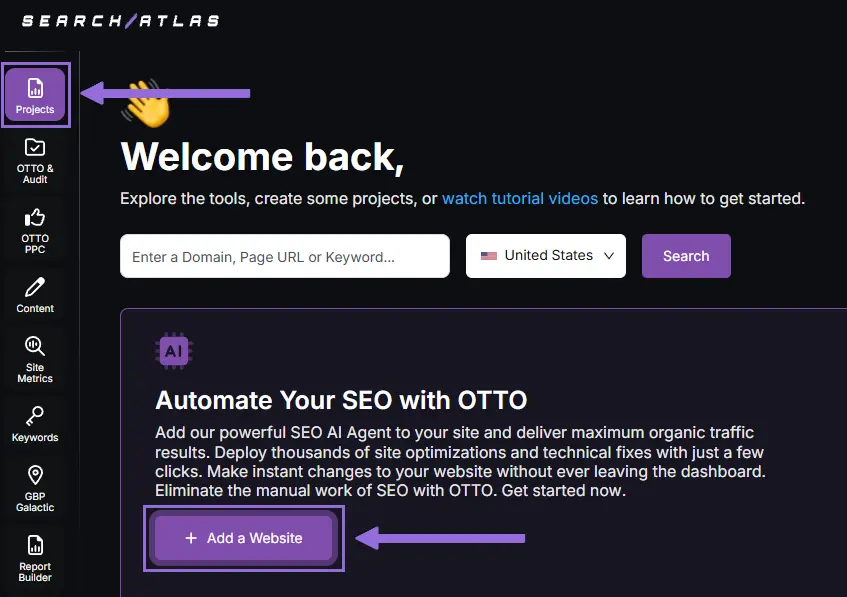
Select one of your projects that doesn’t have OTTO installed, or add a new website.
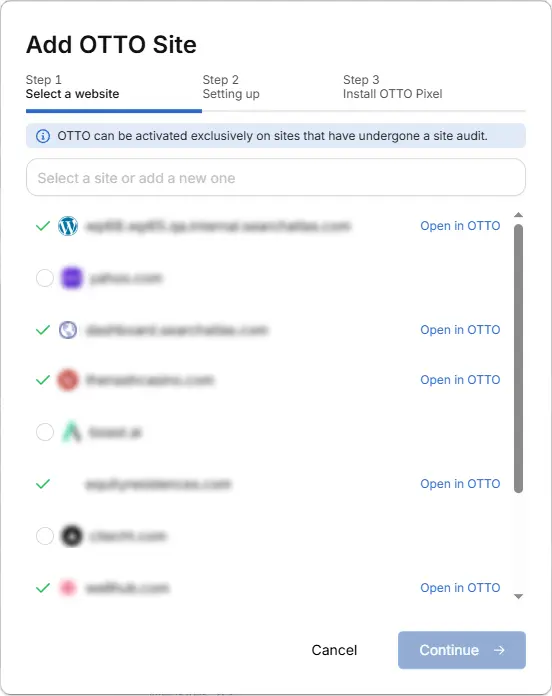
Select the GSC and GBP, and add the details about your business.
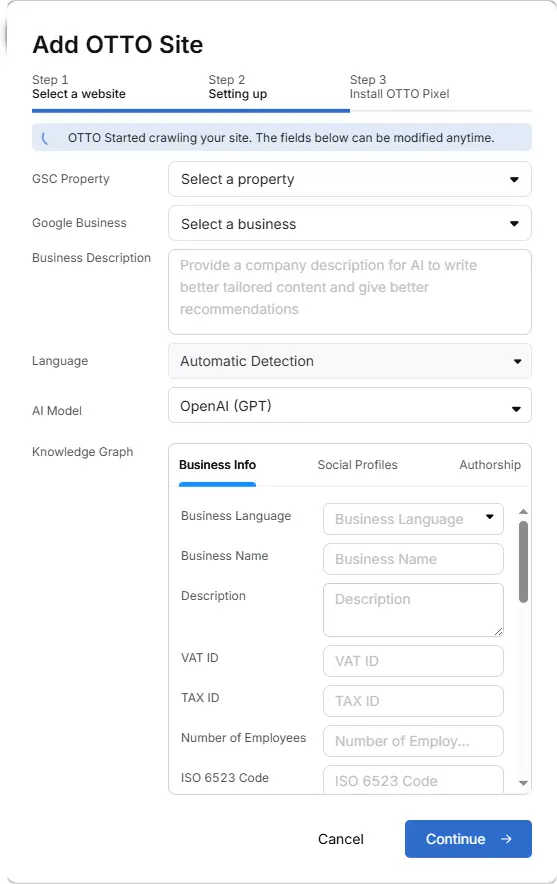
Next, proceed with the tutorial to install OTTO.
Installing OTTO on another CMS
Go to OTTO & Projects > Installation Guide. You will find short tutorial for:
- Google Tag Manager
- WordPress
- Shopify
- Webflow
- Squarespace
- ClickFunnels
- Wix
- GoHighLevel (GHL)
- Custom Installation

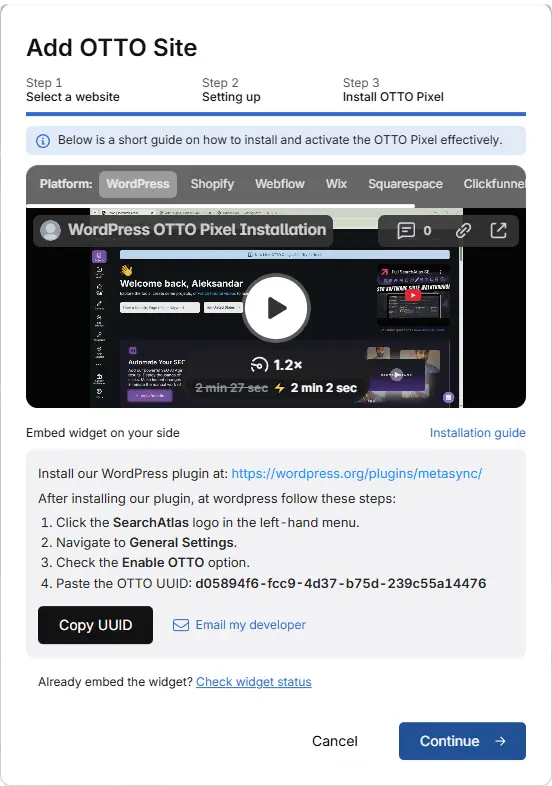
Here is a quick recap on how to install OTTO SEO on WordPress.
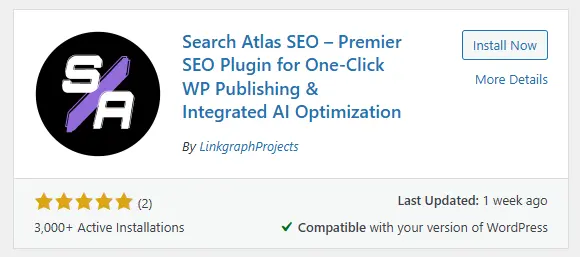
Go to your WordPress dashboard. Open the Plugins section. Search for "Search Atlas" in the plugin directory. Click Install Now, then activate the plugin.
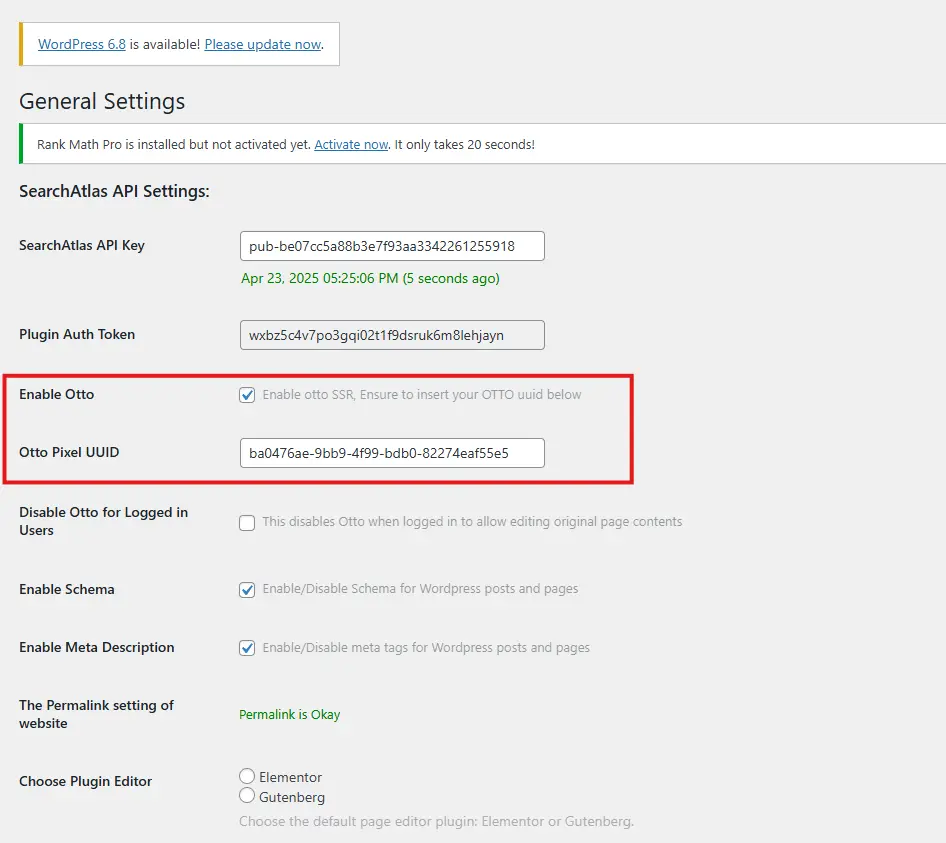
Copy the API key provided during setup. Open the Search Atlas plugin settings by clicking the Search Atlas logo in the left-hand menu. Navigate to General Settings. Paste the API key into the Search Atlas API Key field and continue.
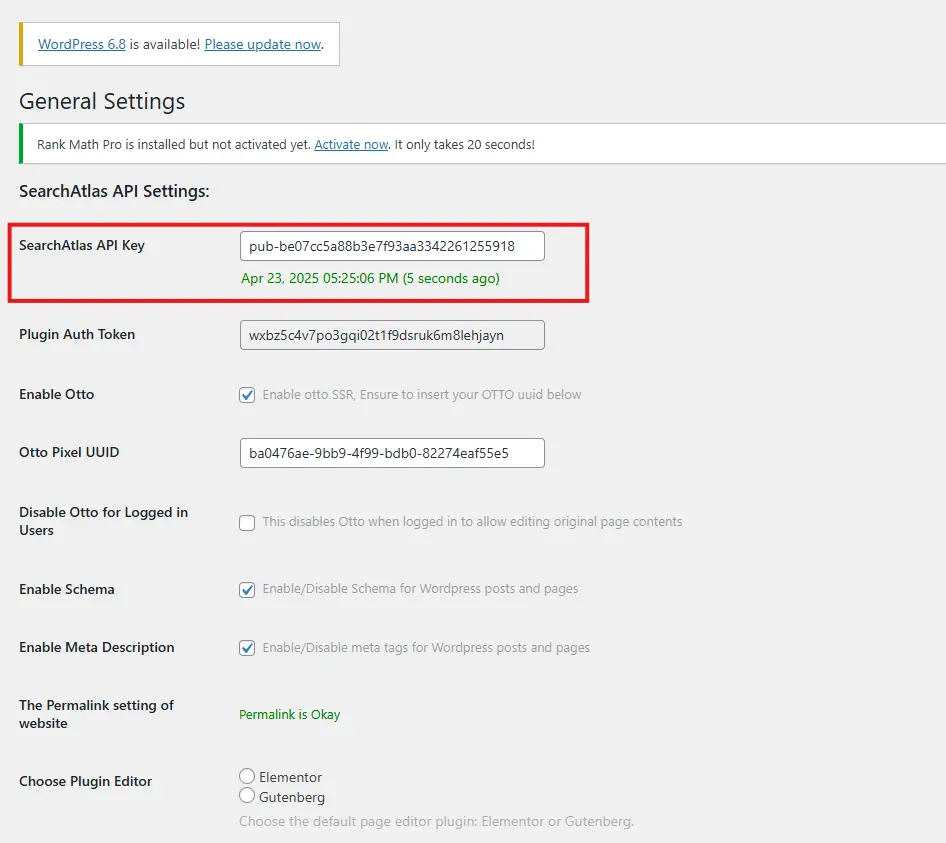
Copy the code provided in the next step. Return to your WordPress dashboard. Access the plugin settings again. In General Settings, check the Enable OTTO box. Paste the code into the OTTO Pixel UUID field. Save changes.
OTTO SEO now runs inside WordPress, automating fixes and SEO updates across your site.
How to Configure OTTO SEO?
Here is a quick tutorial on how to configure OTTO Autopilot and settings.
4. How to Maximize the Search Atlas Onboarding Process?
Search Atlas offers multiple support channels to help you with any questions or issues. Here is how to make the most of our onboarding process.
Watch Tutorial Videos
Search Atlas offers step-by-step tutorials on YouTube to help you set up reports, dashboards, and automations.
Book a 1:1 Onboarding Session
During your trial, you can schedule a 1:1 onboarding session directly from the dashboard. A product expert will help you customize your setup, connect integrations, and configure OTTO SEO for automation.
Follow the 7-Day Email Campaign
As soon as you start your free trial, you’ll receive a 7-day onboarding email sequence. Each email walks you through a core feature.
Technical Documentation
Access full technical docs via the Help Center for detailed instructions on using every tool. Everything is searchable and regularly updated.


