Search Atlas provides an all-in-one SEO platform that extends beyond the content planning and analysis tools offered by MarketMuse.
While MarketMuse focuses on identifying what content to create, Search Atlas simplifies the process by integrating AI-driven content creation, technical SEO automation, and direct publishing into a unified system.
For content teams and agencies, this migration offers a smooth way to move from planning to execution, which saves time and reduces the need for multiple tools.
This guide will walk you through transitioning your content workflows from MarketMuse to Search Atlas, showing how to use Search Atlas’s AI content creation features, automate SEO tasks with OTTO SEO, the Search Atlas SEO automation skill, and simplify your content publishing process for maximum efficiency.
1. What Is the Initial Setup in Search Atlas?
Start by configuring your workspace properly to enable smooth tracking, automation, and performance insights.
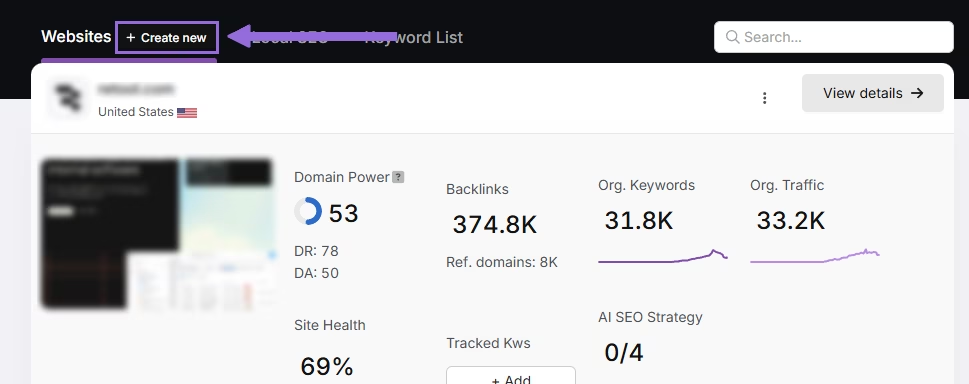
Create a New Project:
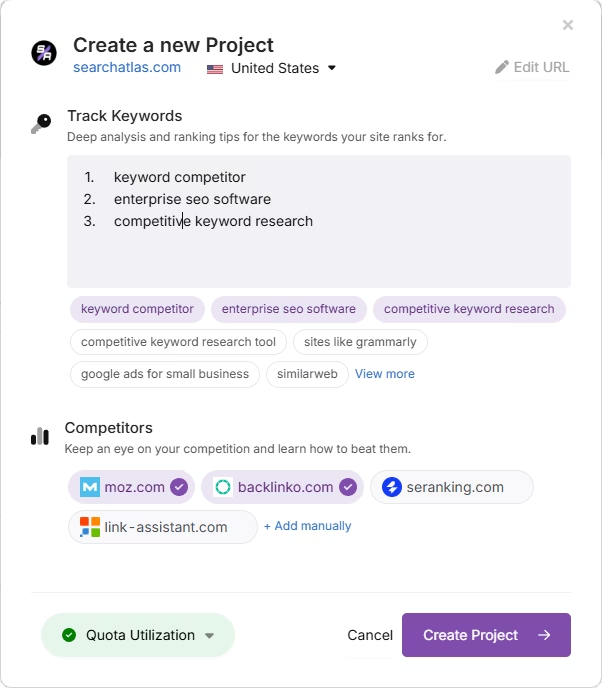
Log in to your Search Atlas account, scroll down in the main Dashboard, and click + Create new.
Enter your domain, select the target country, and optionally enter primary keywords for tracking.
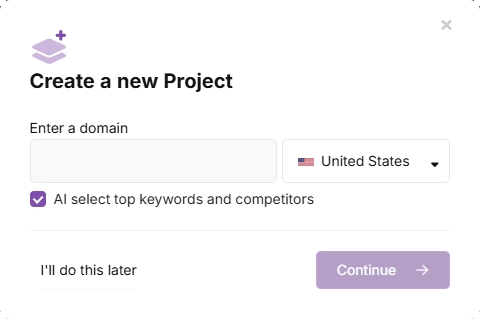
Add or remove recommended keywords, and also add your main competitors. You will be able to change both of these options later.
Connect Key Integrations
Google Search Console (GSC)
Click on Site Metrics > All Sites > Connect GSC Account.
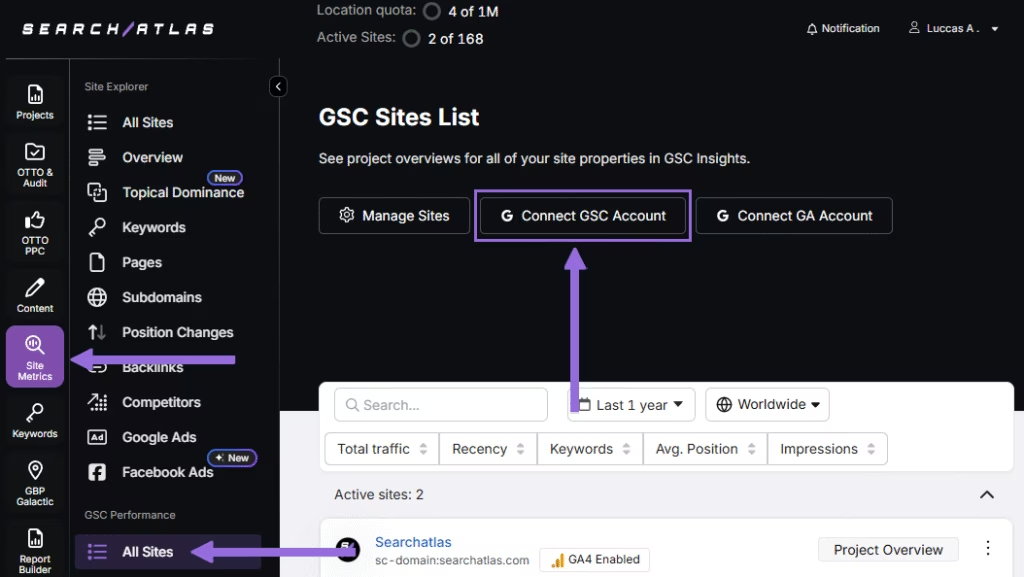
Authorize access and connect your verified property.
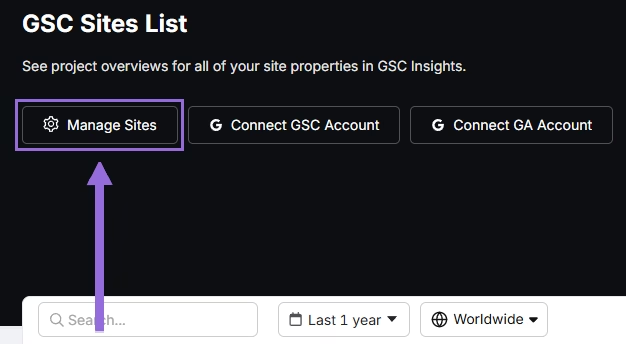
After GSC is connected, go to Manage Sites.
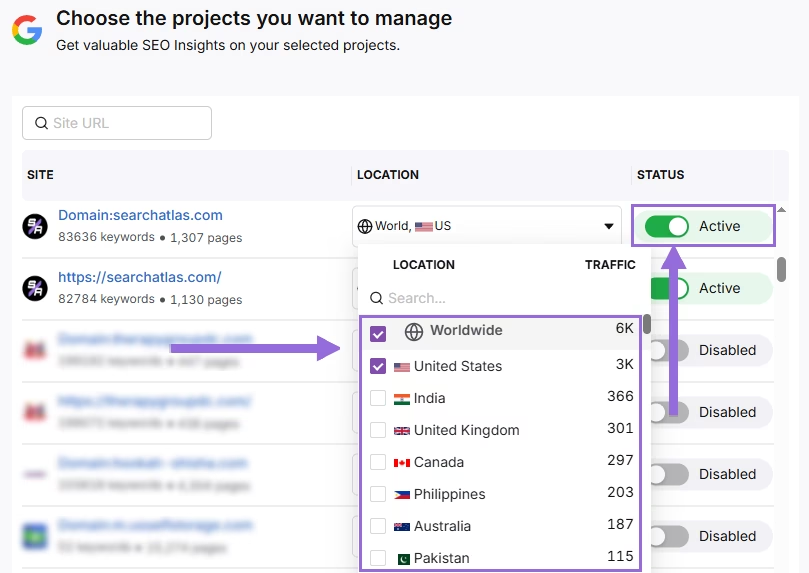
A slider will appear showing all imported GSC properties (they are disabled by default). Find your domain and then click Enable.
Google Analytics 4 (GA4)
From your GSC Performance dashboard, click on Connect Google Analytics 4.
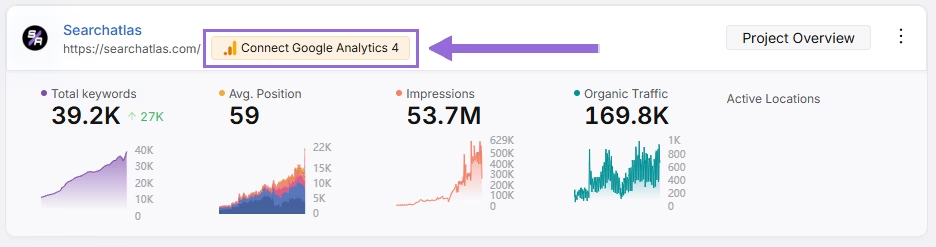
Select your GA property or connect your GA4 account. Authorize access and connect your verified property.
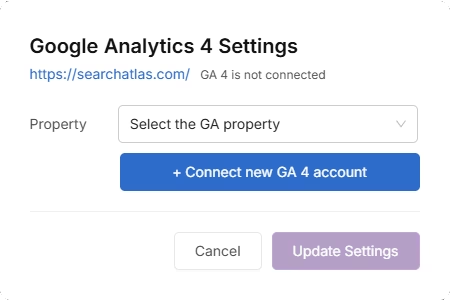
Once enabled, Search Atlas will link keyword data, impressions, CTR, and engagement metrics automatically.
You can use publicly shareable links for fast access to verification if needed.
2. How to Migrate Your Content Editor Workflow?
The migration from MarketMuse’s Optimize consists in bringing your content into Search Atlas’s Content Genius.
Content Genius offers similar content scoring and recommendations while publishing straight to WordPress without extra steps.
From MarketMuse
There is no complex export function needed for your articles. You simply need to retrieve the text.
Navigate to your published article on your website or open the Google Doc where the final version is saved, and copy the entire text content of the article.
Alternatively, copy the URL of the Google Doc or the published content and import into Search Atlas.
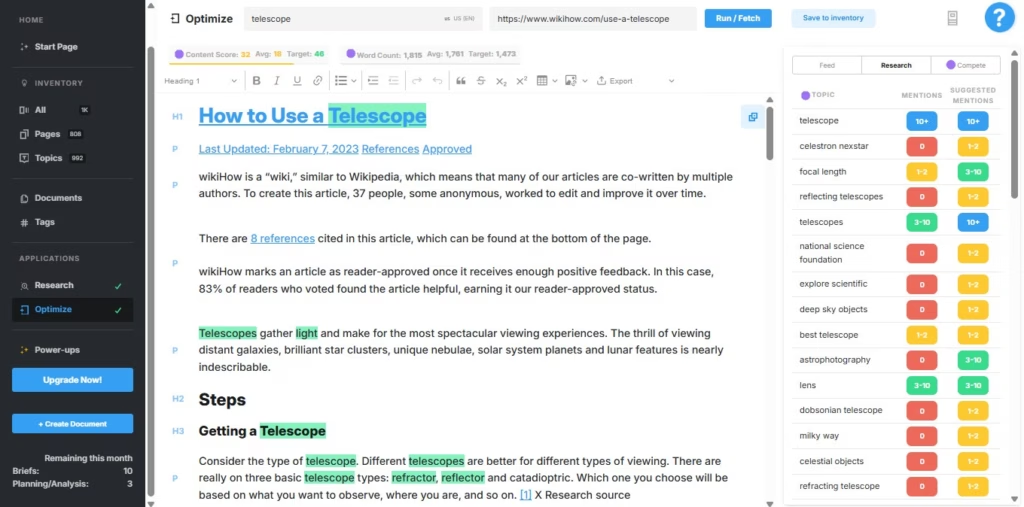 Via MarketMuse
In Search Atlas
Navigate to Content > Content Genius.
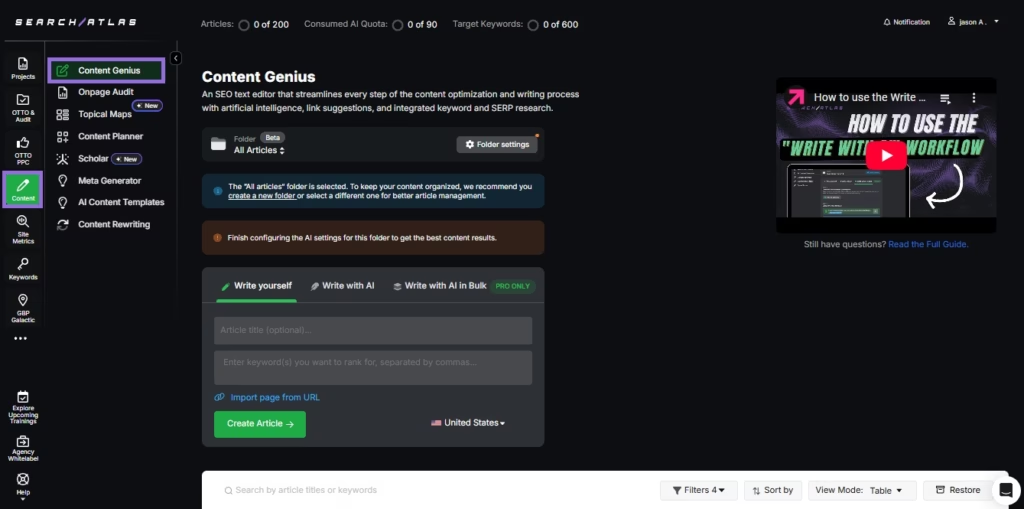
Click on the Write Yourself option, and select Create Article
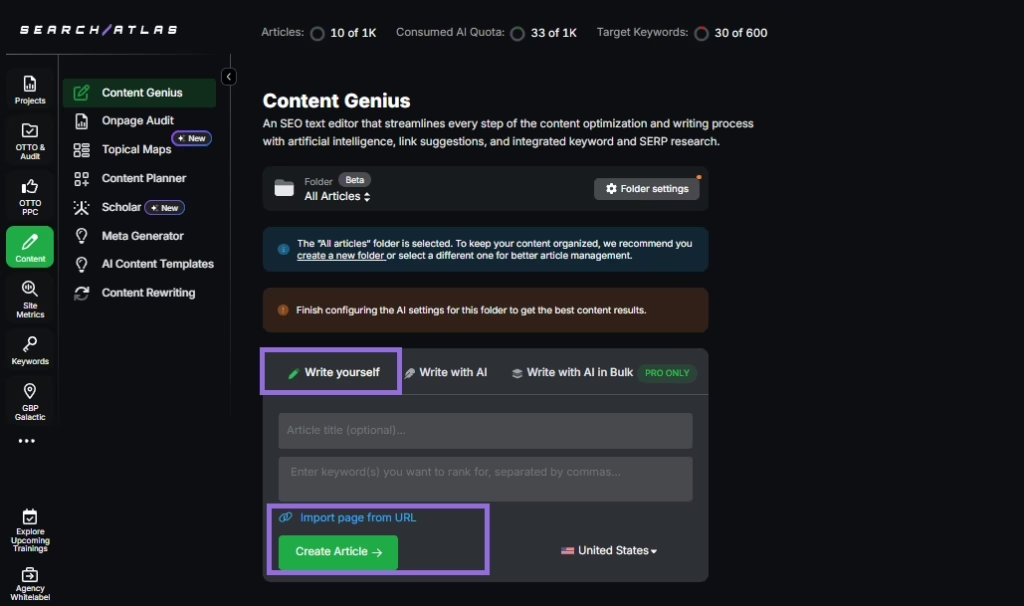
You can either paste your existing article text directly into the editor, or
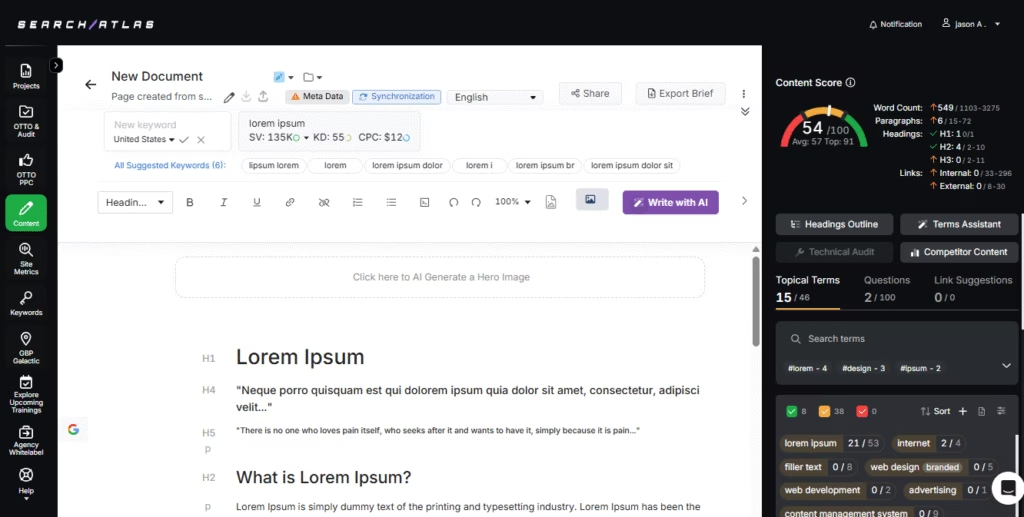
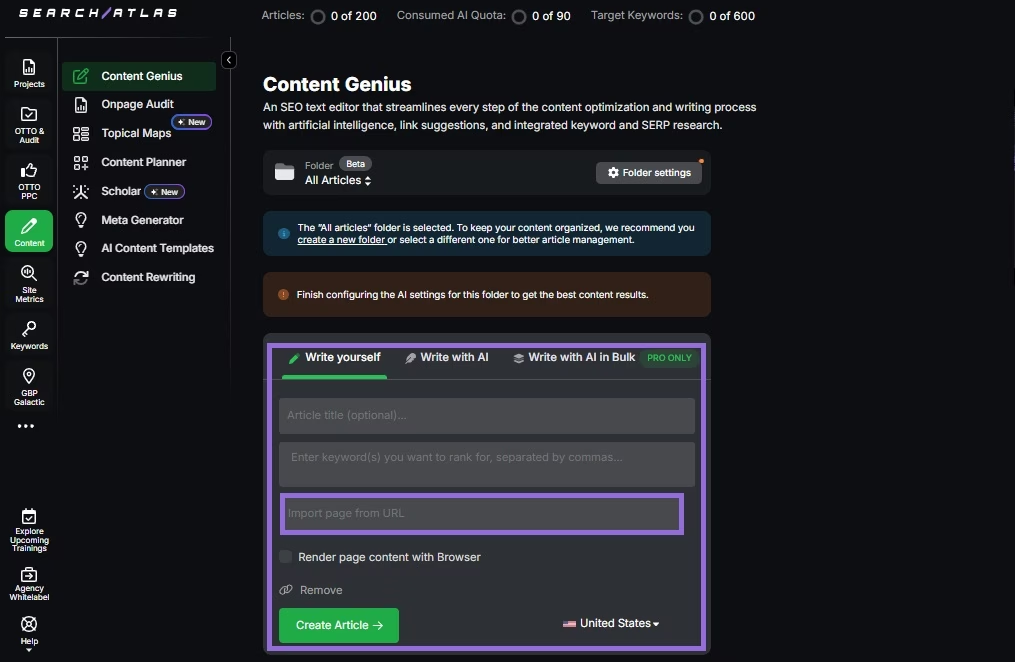
Enter the URL of the content you want to import, along with the keyword (s) you want to rank for, and the editor will automatically retrieve it.
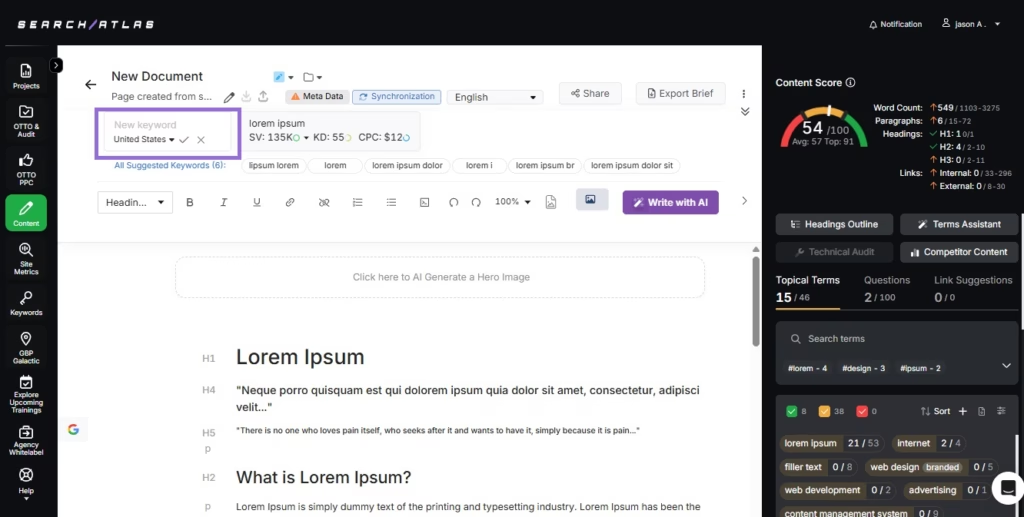
Enter your primary target keyword for the article and click the check mark to start the analysis.
Content Genius evaluates technical improvements, content structure, and keyword optimization.
It provides actionable recommendations for schema updates, link additions, and term usage to align your content with top-ranking pages in your niche.
3. How to Set Up Direct WordPress Publishing?
There are no steps to perform in MarketMuse for this feature. This is a new workflow in Search Atlas.
In WordPress
Install the Plugin
In your WordPress dashboard, navigate to the Plugins section in the left-hand menu and click Add New Plugin.
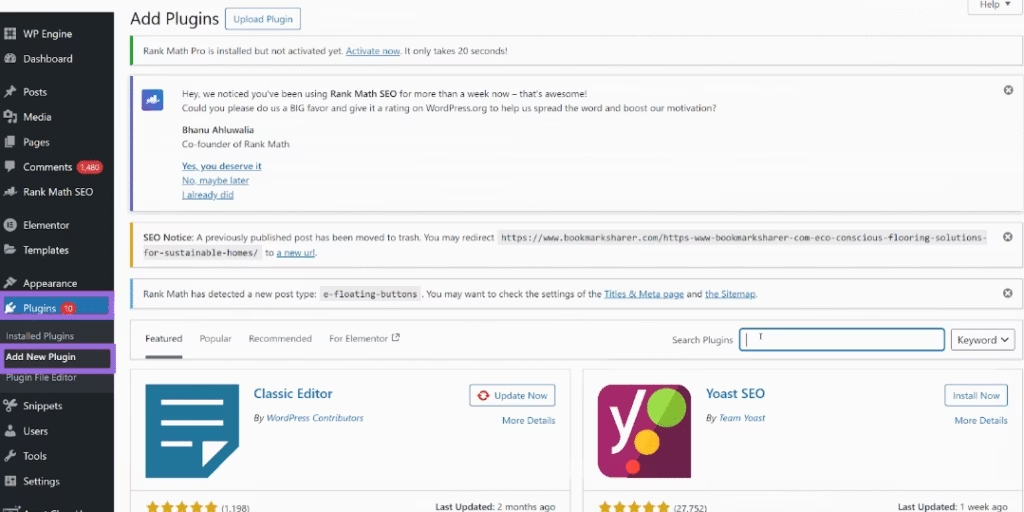
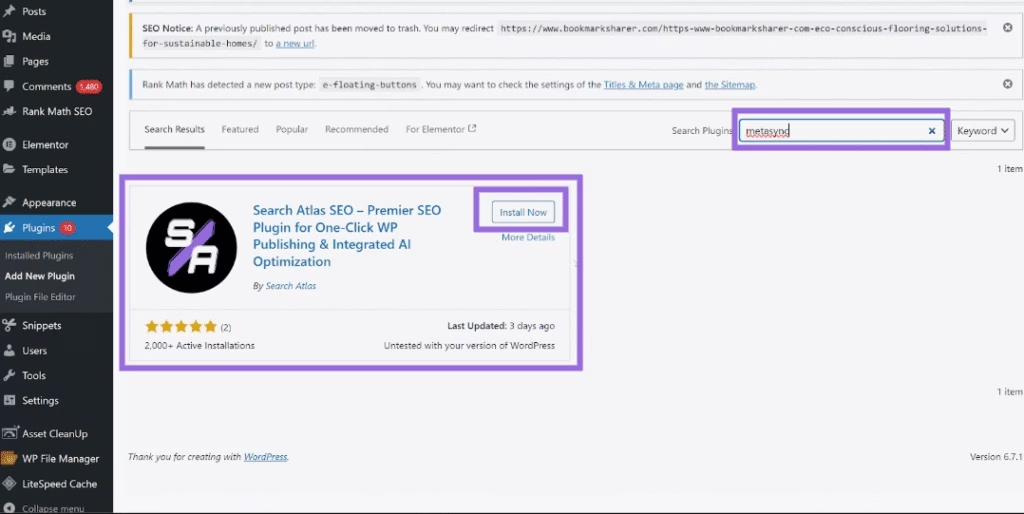
Search for Search Atlas SEO or Metasync in the search bar and click Install Now.
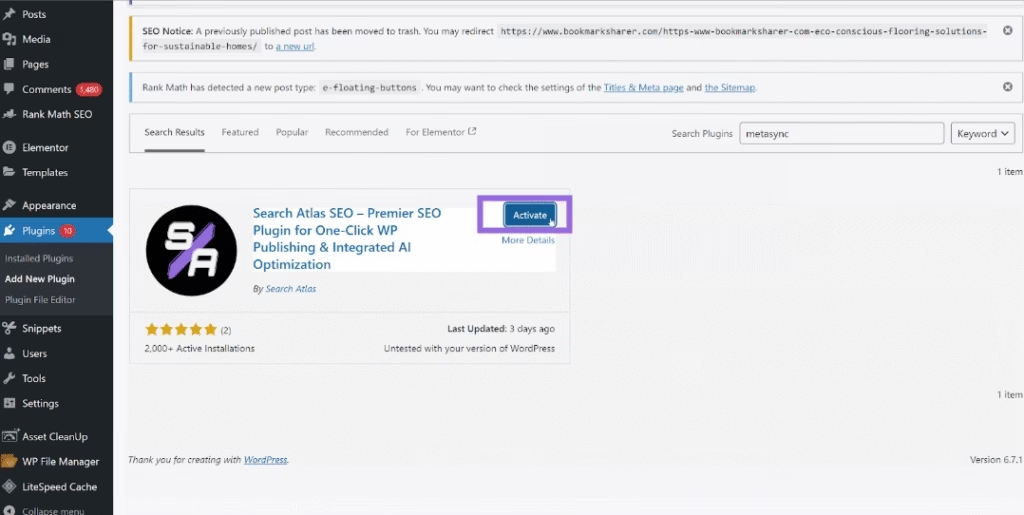
When the installation is complete, click Activate.
Connect Search Atlas with WordPress
After installing and activating the Search Atlas WordPress Plugin, go to Search Atlas in the left menu of your WordPress dashboard.
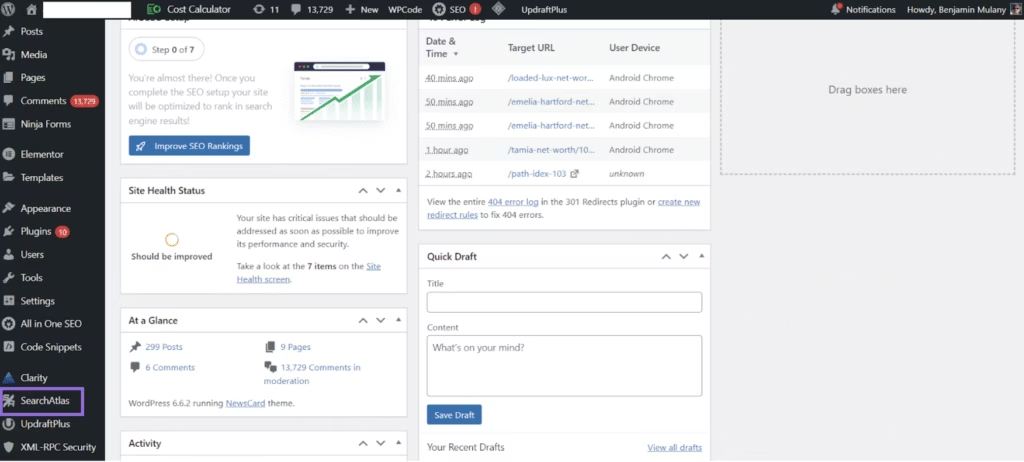
In the settings page that appears, paste your copied API key into the Search Atlas API Key field.
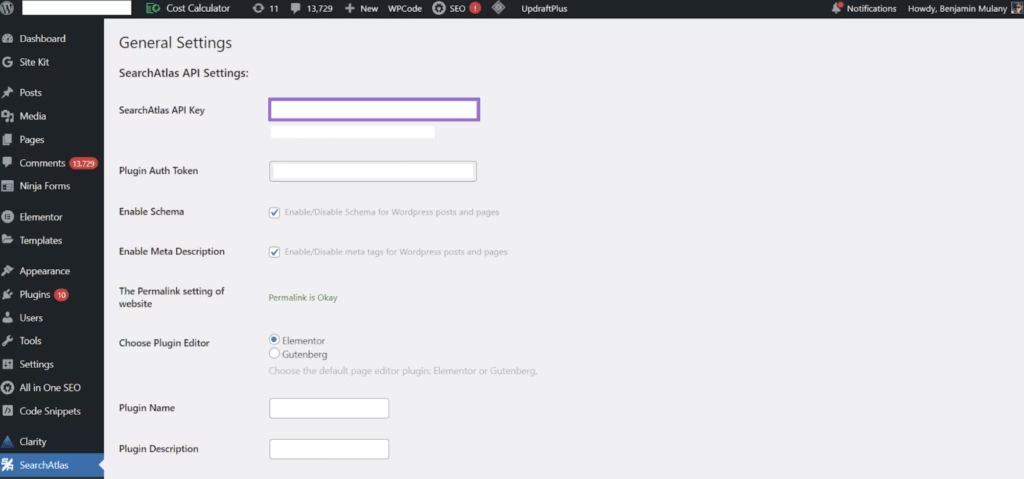
Get Your API Key
To get your Search Atlas API key, go to your Search Atlas dashboard and click on Settings.
Then click on the API Keys tab.
Click the button to copy the API Key.
Connect the Plugin
Go back to your WordPress dashboard > Search Atlas > Settings.
Paste the copied API key into the Search Atlas API Key field.
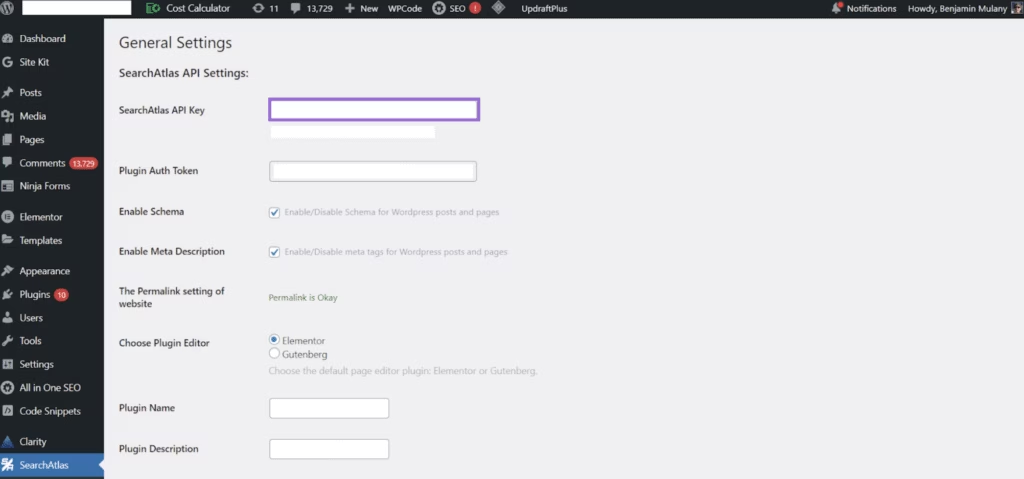
Click on Save Changes.
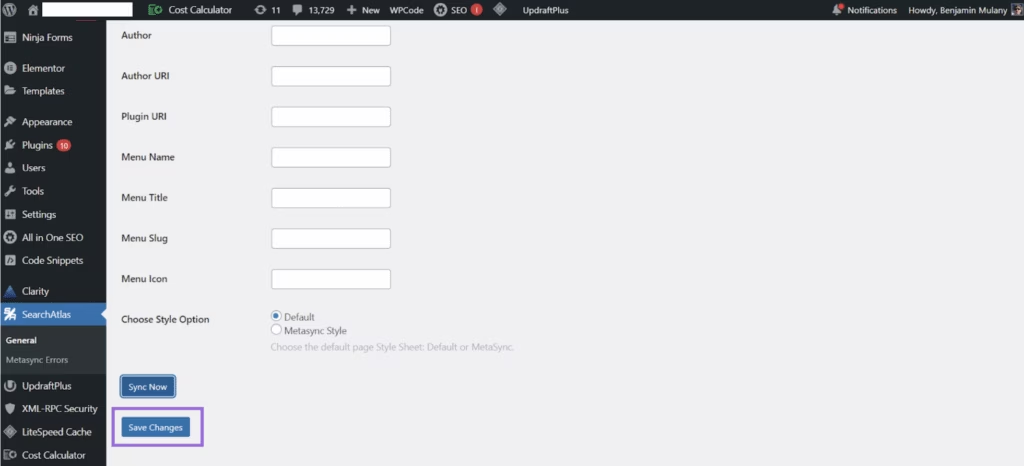
Your Search Atlas plugin is now connected to your WordPress site.
With this integration, Content Genius publishes finished articles straight to your WordPress website.
4. How to Replace MarketMuse’s Research Topics with Search Atlas’ Topical Map & Content Planner?
MarketMuse’s Research Topics and Assess Clusters help in understanding content gaps and opportunities.
Search Atlas builds on these insights with its Topical Map and Content Planner, integrating topic discovery directly into a strategic editorial workflow and automated content creation.
From MarketMuse
Log in to MarketMuse and navigate to your Research Topics analysis.
Review the identified topic clusters, keywords, and content gaps. You can export keyword lists you wish to keep for your records as CSVs or PDFs.
In Search Atlas
Access the Topical Map
Navigate to Content > Topical Map.
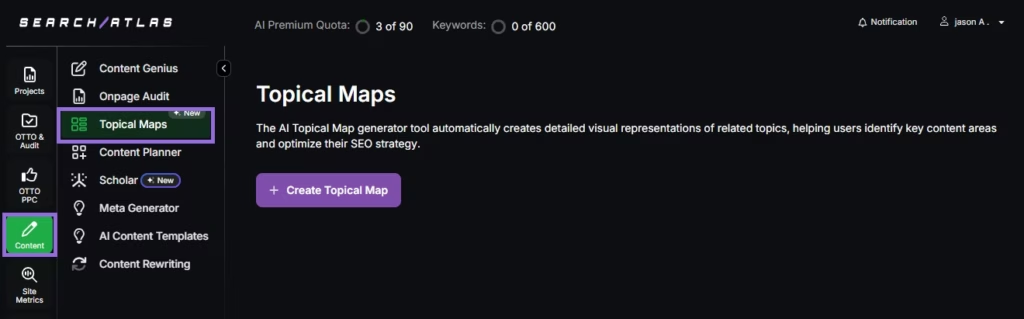
Click Create Topical Map and specify the number of clusters you wish to create, how many long-tail keywords should be generated for each cluster, and the desired number of titles for each long-tail keyword.
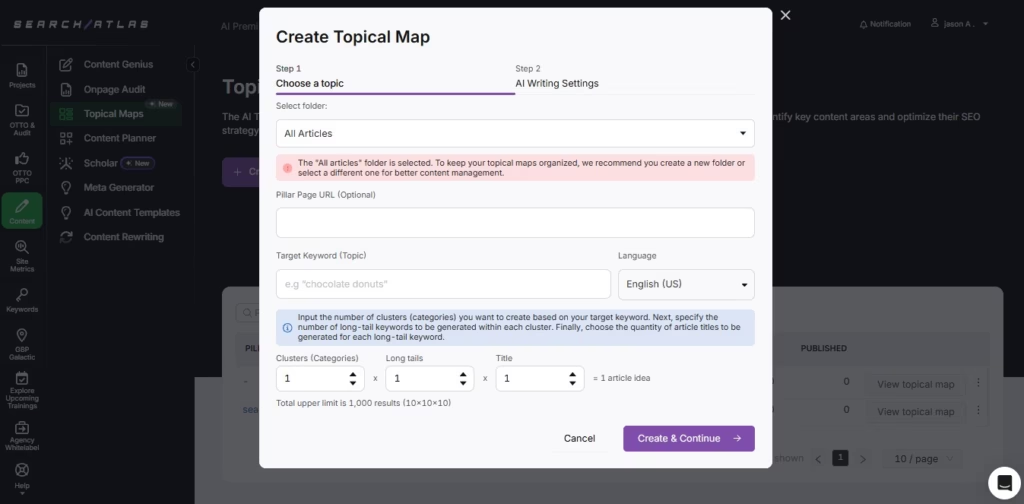
Choose your preferred AI settings and click Update Settings.
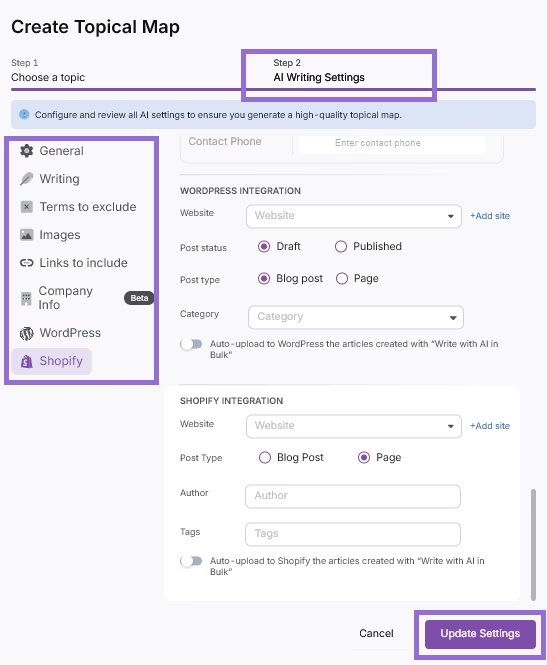
Once the topical maps are generated, you can view them in the table provided. Click on the View topical map button.
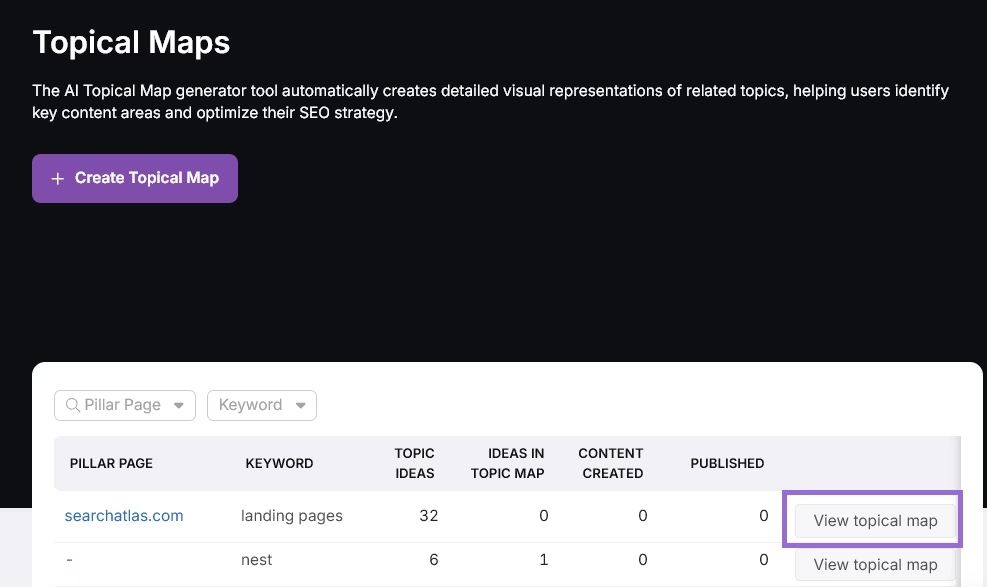
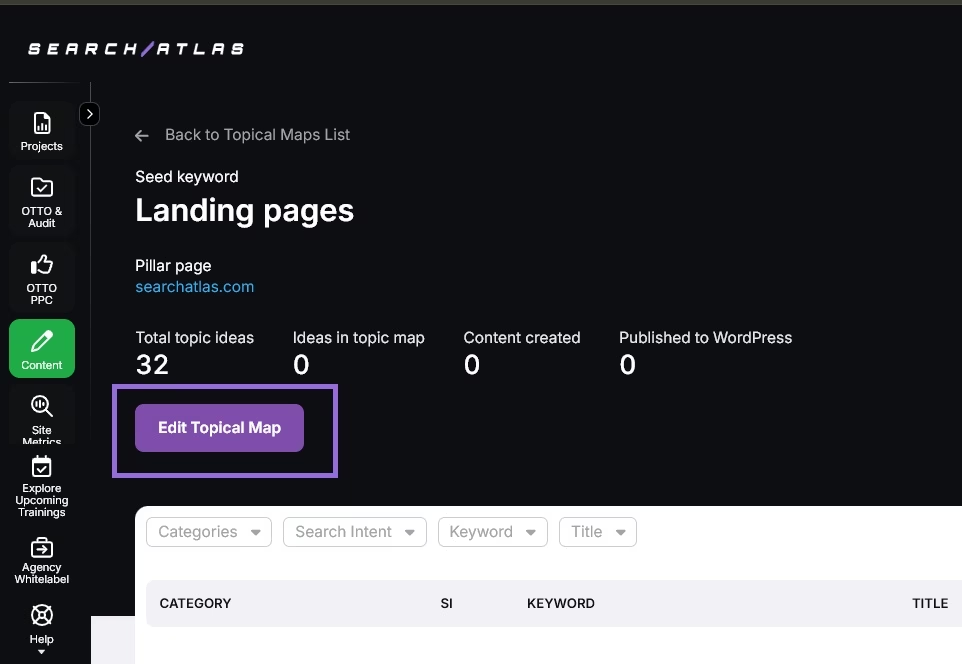
To add ideas to your topical map, click the Edit Topical Map button.
You have the flexibility to view your topical map ideas in either a Diagram or Table format.
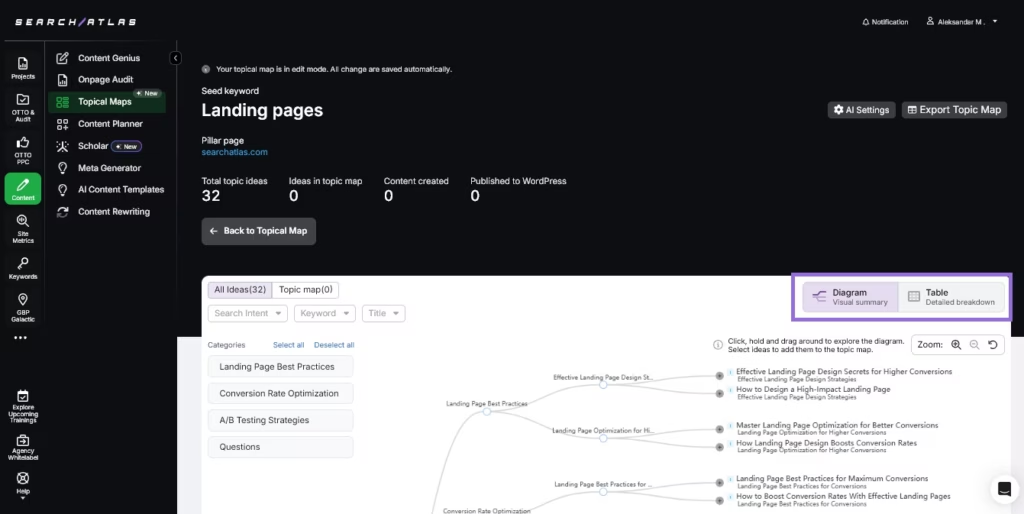
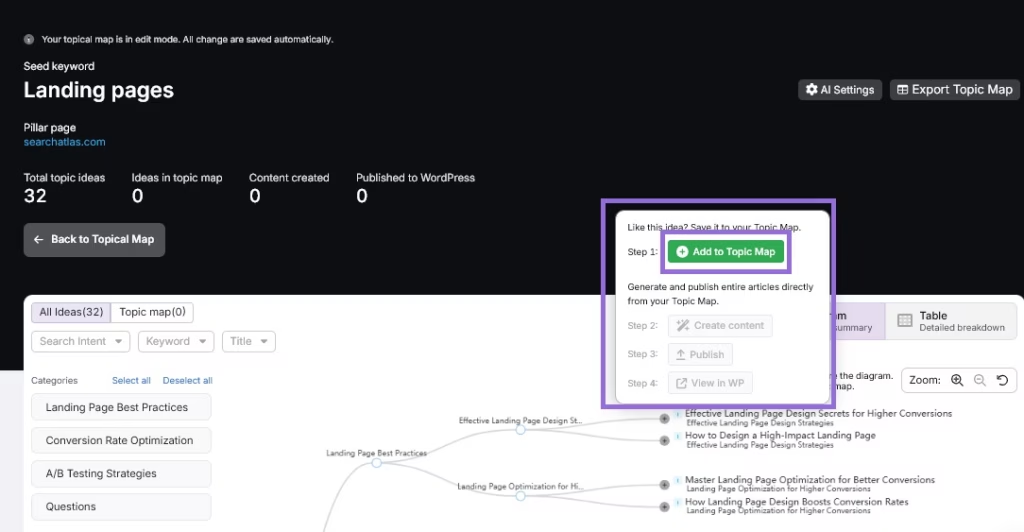
If you’re in Diagram format, select a node to reveal a pop-up menu.
Click Add To Topical Map to incorporate that specific idea into your plan.
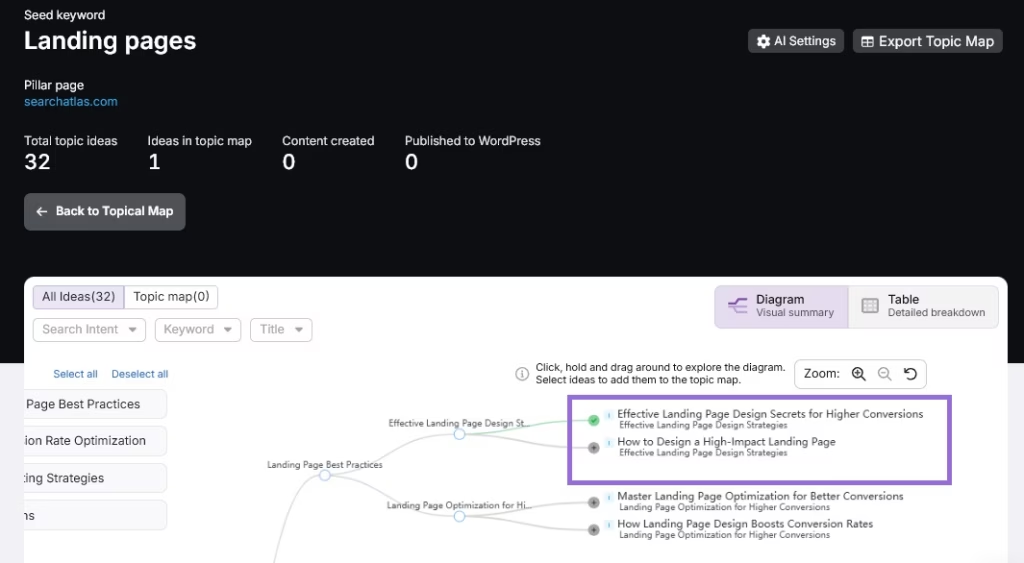
Gray nodes indicate ideas not yet added to the topical map, while green nodes represent ideas that have been included.
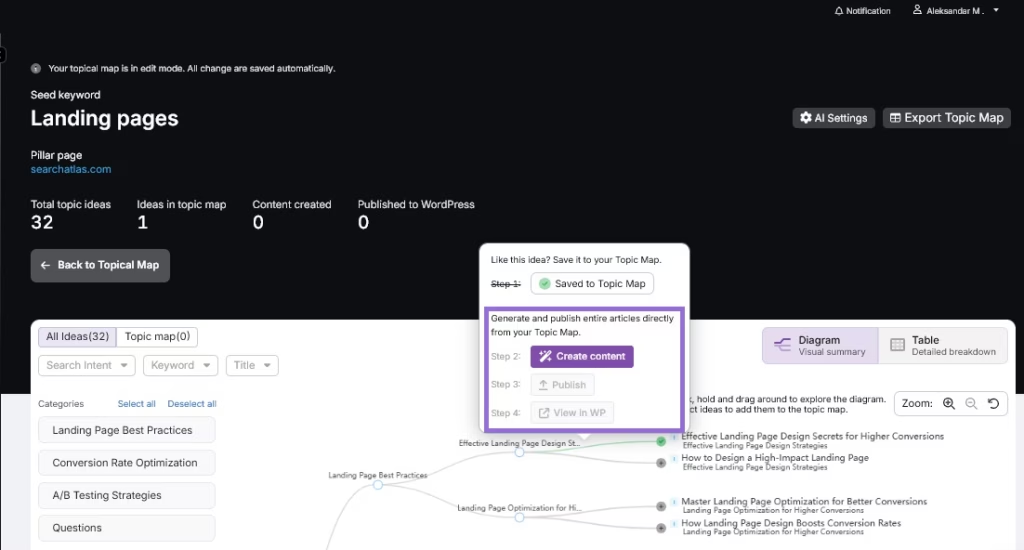
After adding an idea to the topical map, you can create content, publish it, and view it on your WordPress website.
Execute Your Strategy Using the Content Planner
Go to Content > Content Planner.
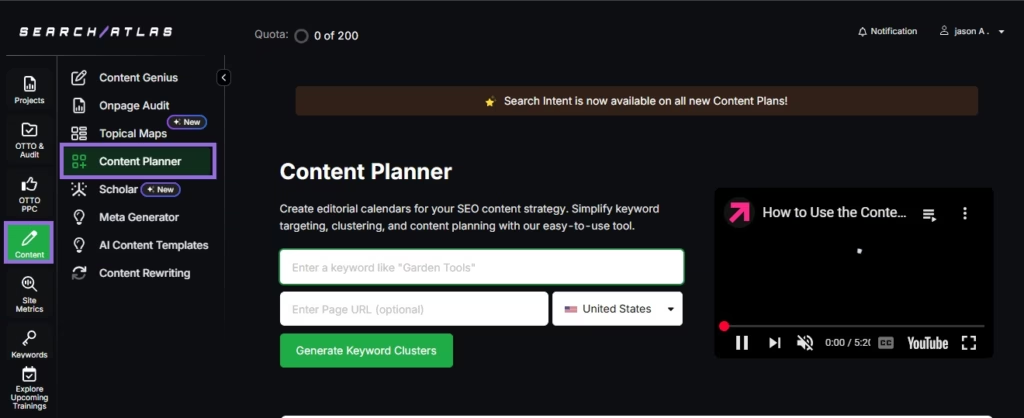
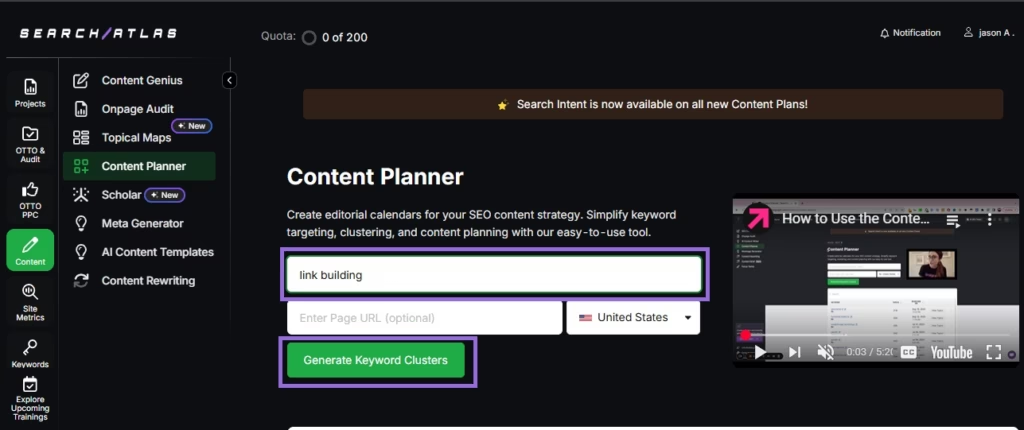
Enter a seed keyword, and Content Planner will generate clusters of related keywords, grouped by a number of metrics including search intent and difficulty.
Click on a cluster, review, and select the relevant keywords that align with your content strategy goals.
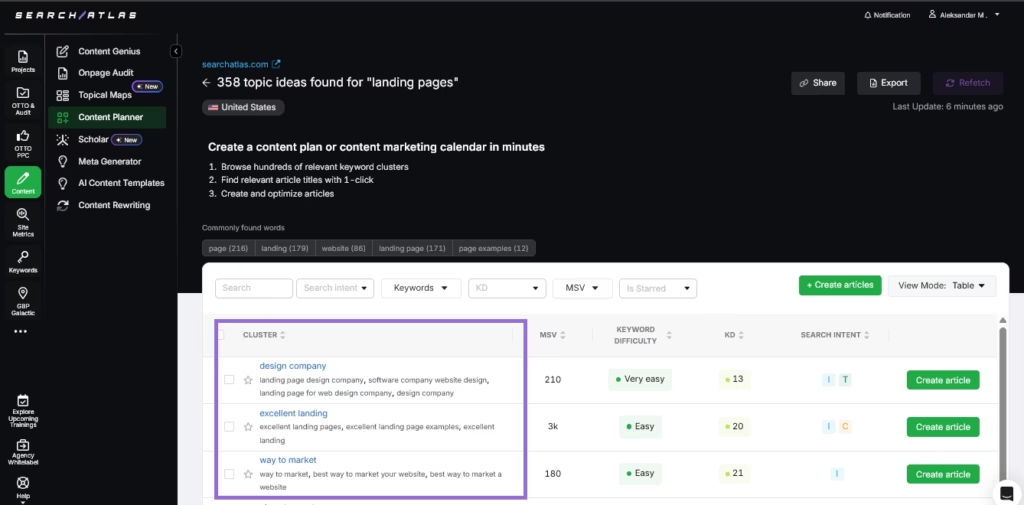
Use the checkboxes to select or deselect multiple keywords within the cluster.
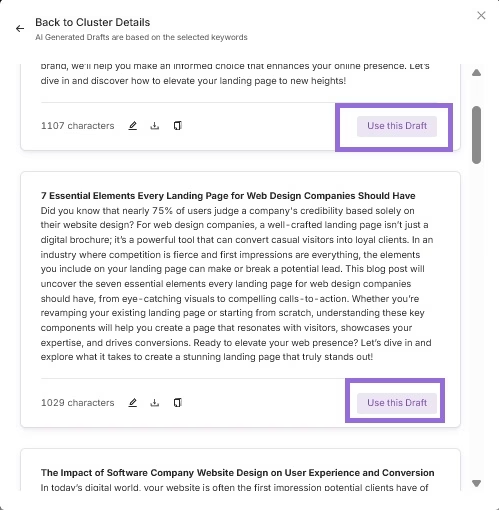
Once you’ve finalized your selection, you can opt to choose Generate Article Suggestions to get a preview of AI-generated suggestions.
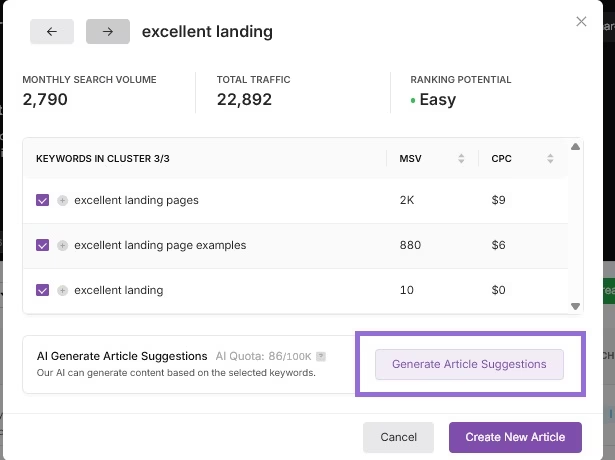
You would be presented with a number of AI suggestions to pick from. Review and click on Use this Draft.
Click on Create New Article to proceed.
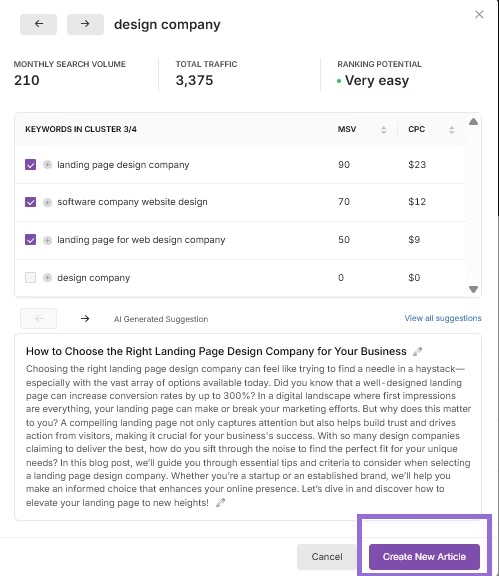
The editor will guide you through drafting your content using built-in AI suggestions.
5. How to Replace MarketMuse’s Inventory/Content Audit with Page Pruning?
MarketMuse’s Inventory and Content Audit features provide analysis and recommendations for improving your site’s content.
Search Atlas offers Page Pruning, which identifies underperforming pages on your website and categorizes them for strategic action based on their performance and potential impact on your overall SEO health.
There is no need to export or import any data for this step from MarketMuse; you simply run a fresh analysis in Search Atlas.
In Search Atlas
Page Pruning analyzes all of your published content to find underperforming pages that could be harming your site’s overall SEO health.
Navigate to OTTO & Audit > Site Audit. Make sure you have already run a complete site crawl.
Once the crawl is complete, click on the Page Pruning tab.
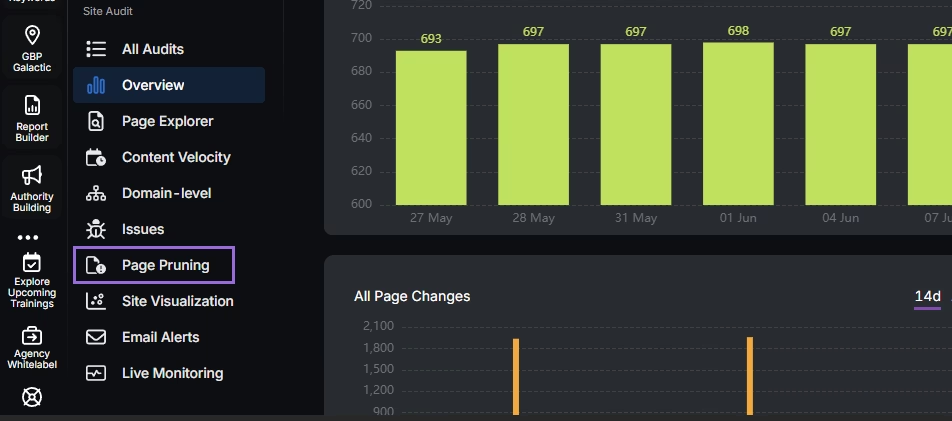
It provides a Pruning Overview with metrics like % of Low Quality Pages, Low Quality Pages, Low Impressions Pages, and Thin Content Page. It then categorizes your content into actionable groups:
- Pruning: Low-value pages (e.g., thin, outdated, or duplicate) that should be considered for deletion or redirection.
- Poor Content: Pages with thin, duplicate, or irrelevant content that hurts SEO.
- Low Quality: Pages that negatively impact user experience and search engine perception, often requiring improvement, consolidation, or removal.
- Boostable: Pages with impressions but low traffic, indicating they need content quality improvements.
6. How to Enable Automated SEO Optimization in Search Atlas with OTTO?
MarketMuse does not offer an AI SEO agent.
With Search Atlas, you can set up OTTO, an AI agent that automates SEO tasks like technical audits, on-page optimization, and content creation, simplifying workflows and minimizing manual effort.
Obs: It’s necessary to go through the Site Audit on your project before activating OTTO.
Go to Projects > + Add a Website
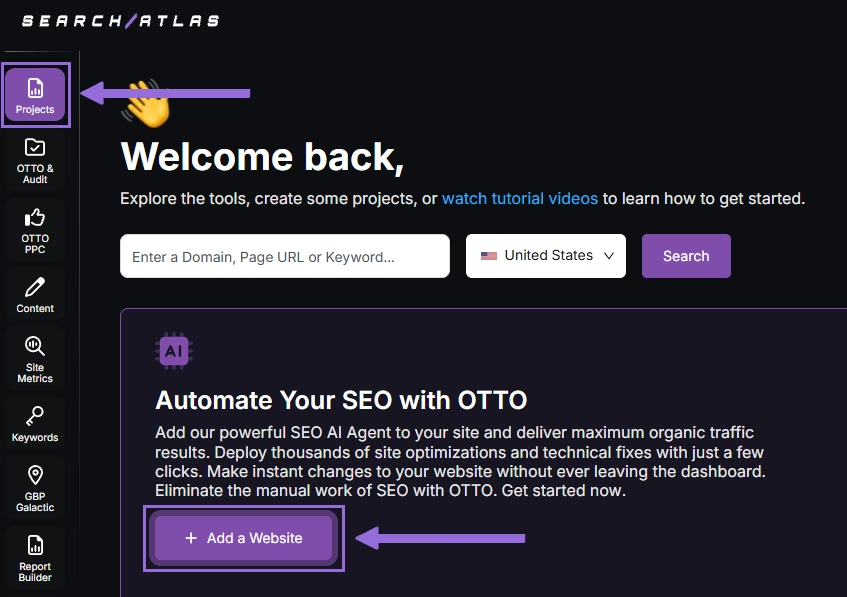
Select one of your projects that doesn’t have OTTO installed, or add a new website.
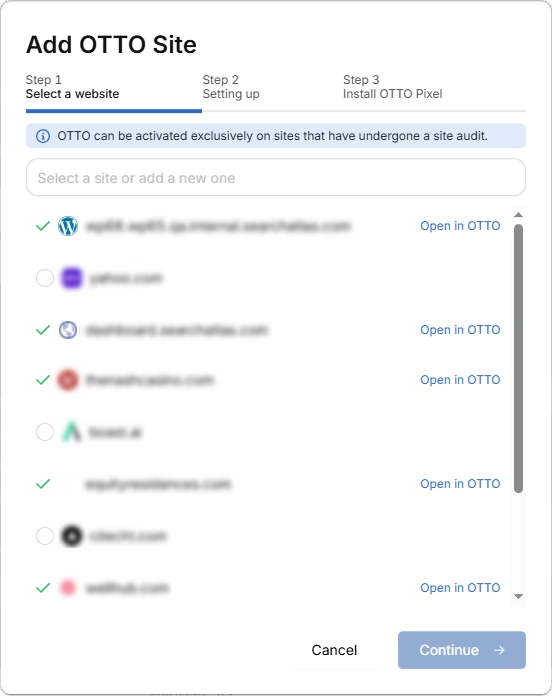
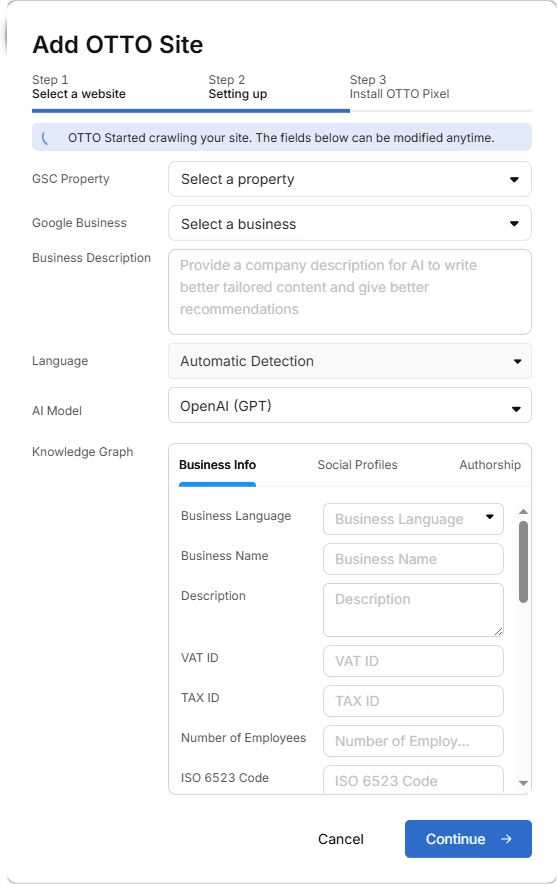
Select the GSC and GBP profiles for the project and add your business details.
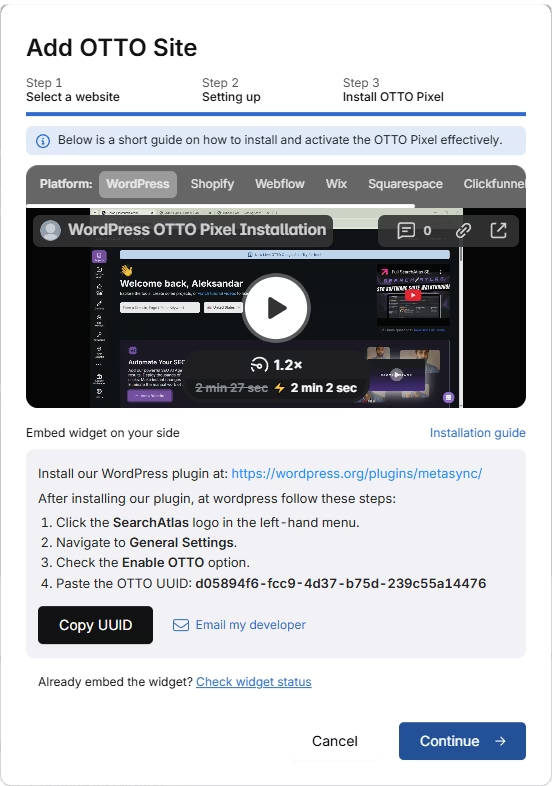
Follow the step-by-step tutorial to install the OTTO pixel on your website.
Installing OTTO on another CMS
Go to OTTO & Projects > Installation Guide. You will find short tutorials for:
- Google Tag Manager
- WordPress
- Webflow
- Squarespace
- Shopify
- ClickFunnels
- Wix
- GoHighLevel (GHL)
- Custom Installation
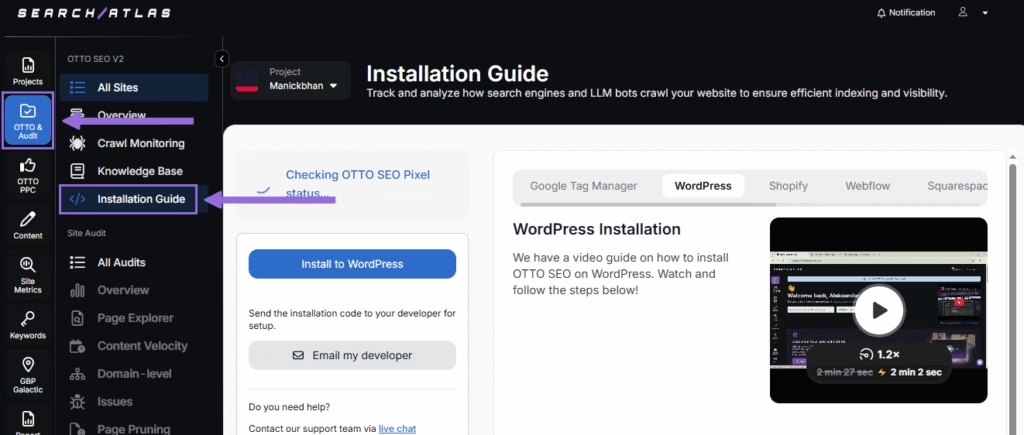
Here is a quick recap on how to install OTTO on WordPress.
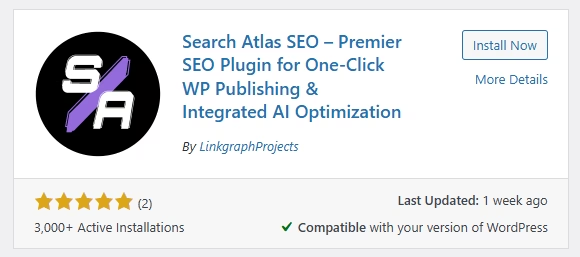
Go to your WordPress dashboard. Open the Plugins section. Search for “Search Atlas” in the plugin directory. Click Install Now, then activate the plugin.
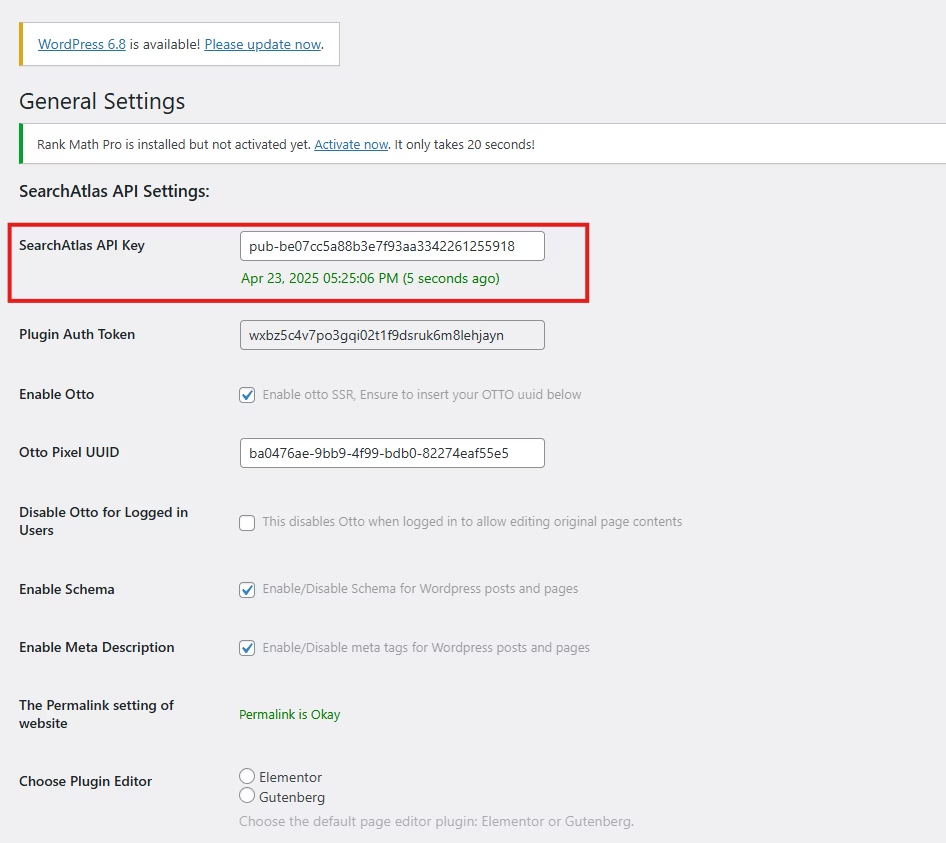
Copy the API key provided during setup. Open the Search Atlas plugin settings by clicking the Search Atlas logo in the left-hand menu. Navigate to General Settings. Paste the API key into the Search Atlas API Key field and continue.
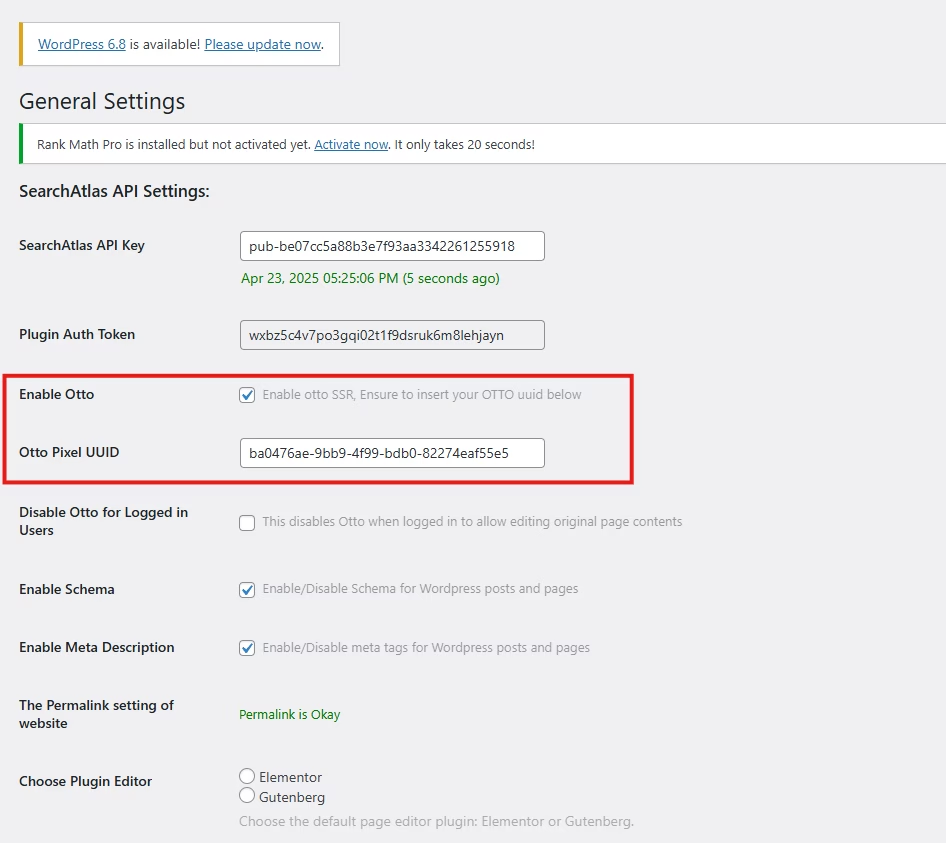
Copy the code provided in the next step. Return to your WordPress dashboard. Access the plugin settings again. In General Settings, check the Enable OTTO box. Paste the code into the OTTO Pixel UUID field. Save changes.
OTTO now runs inside WordPress, automating fixes and SEO updates across your site.
How to Configure OTTO?
Here is a quick tutorial on how to configure OTTO Autopilot and its settings.
7. Exporting MarketMuse Reports and Setting Up Reports in Search Atlas?
MarketMuse does not include a Report Builder for creating comprehensive and automated reports.
From MarketMuse
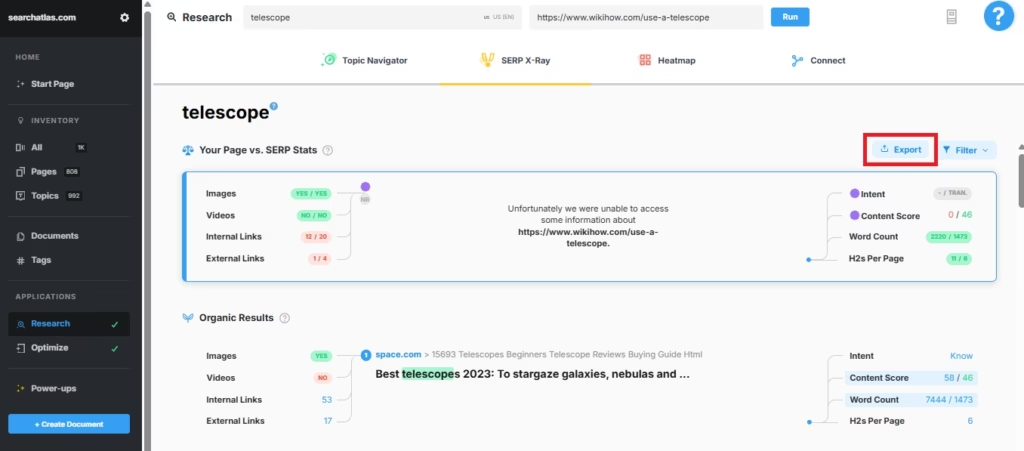
Navigate to Access Optimize, Analyze Competitors, X-Ray SERP, Assess Clusters, Research Topics, and Discover Links.
Click Export to download the insights for future reference.
 Via MarketMuse
In Search Atlas
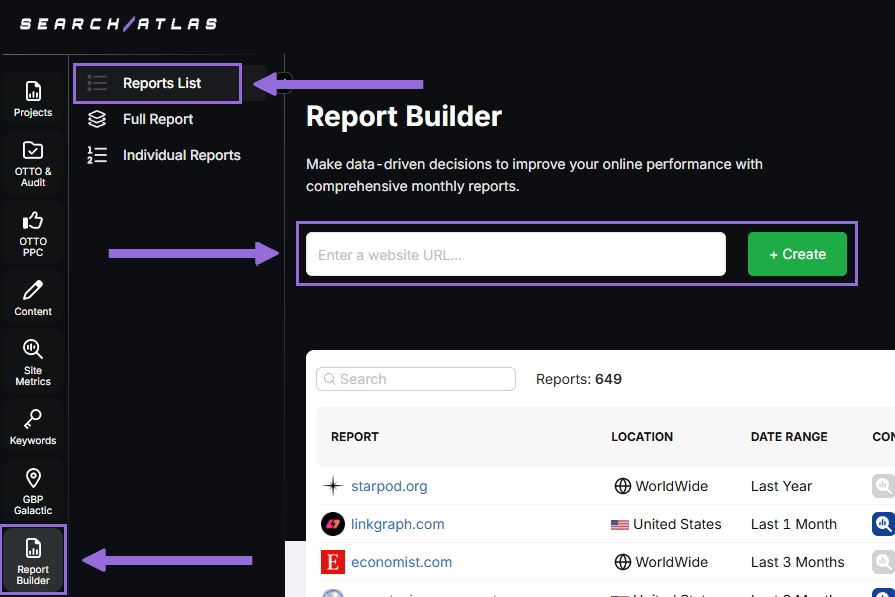
Go to Report Builder > Report List.
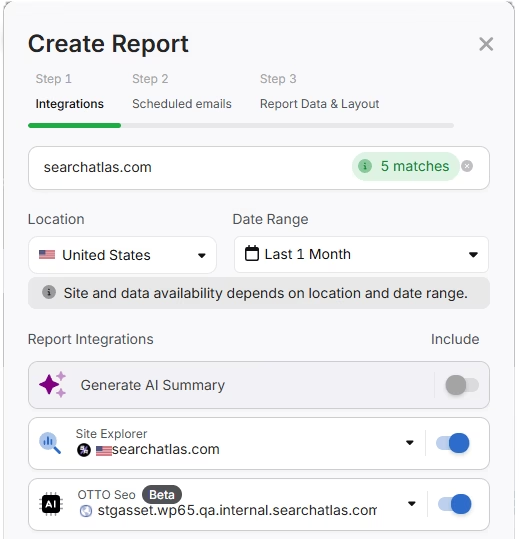
Choose the location, date range, and the widgets you want to report, like:
- AI Summaries
- Site Explorer
- OTTO
- Orders & Tasks
- Google Analytics data
- Google Search Console data
- Facebook Ads
- Google Ads
- Google Business Profile
- Keyword Rank Tracking
Next, set up automated reporting by adding recipients. Select how often to email the report (weekly, monthly, or quarterly), and pick the day of the week for delivery.
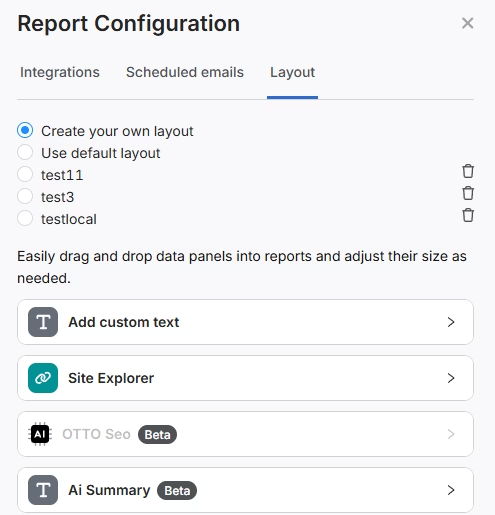
Choose between Default Layout and Custom Layout, and create the report.
Customize the Reporting
After creating the report, click Configure Report to change the Integrations, Scheduled emails, and Layout.
In the Layout section, you can customize the report entirely.
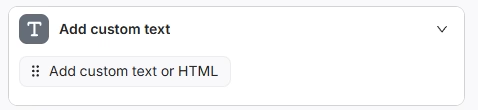
Click Add Custom Text to include your own text or HTML, allowing you to add branding elements like your logo, banner, or links.
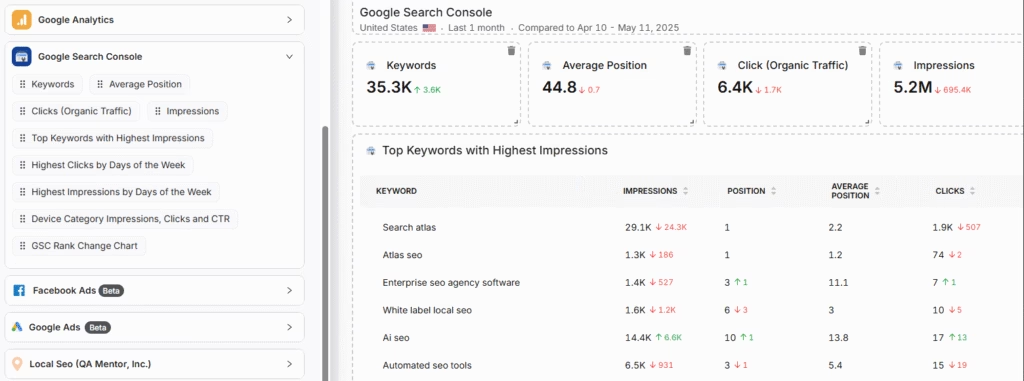
Scroll down to click and drag each metric into the report. You can position them wherever you prefer.
Add the AI Summaries
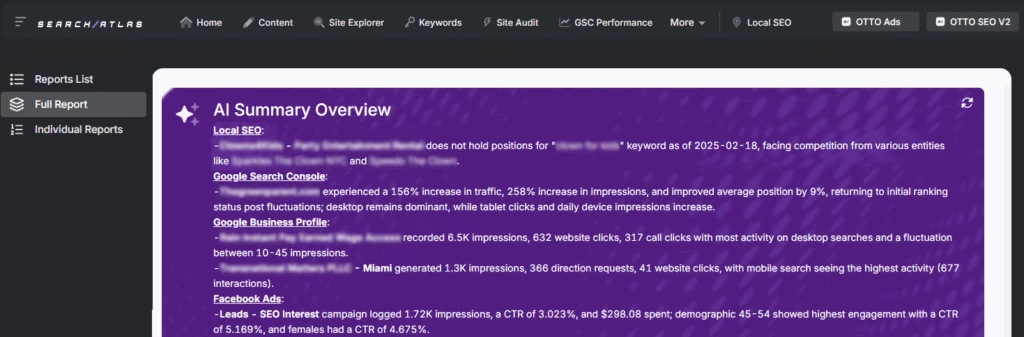
In the Integrations section, you can include the AI Summary Overview.
These automated summaries highlight the key insights from your report, making it easier for you and your stakeholders to quickly understand the results.
Creating a Local SEO Report
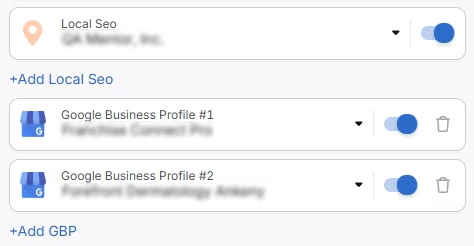
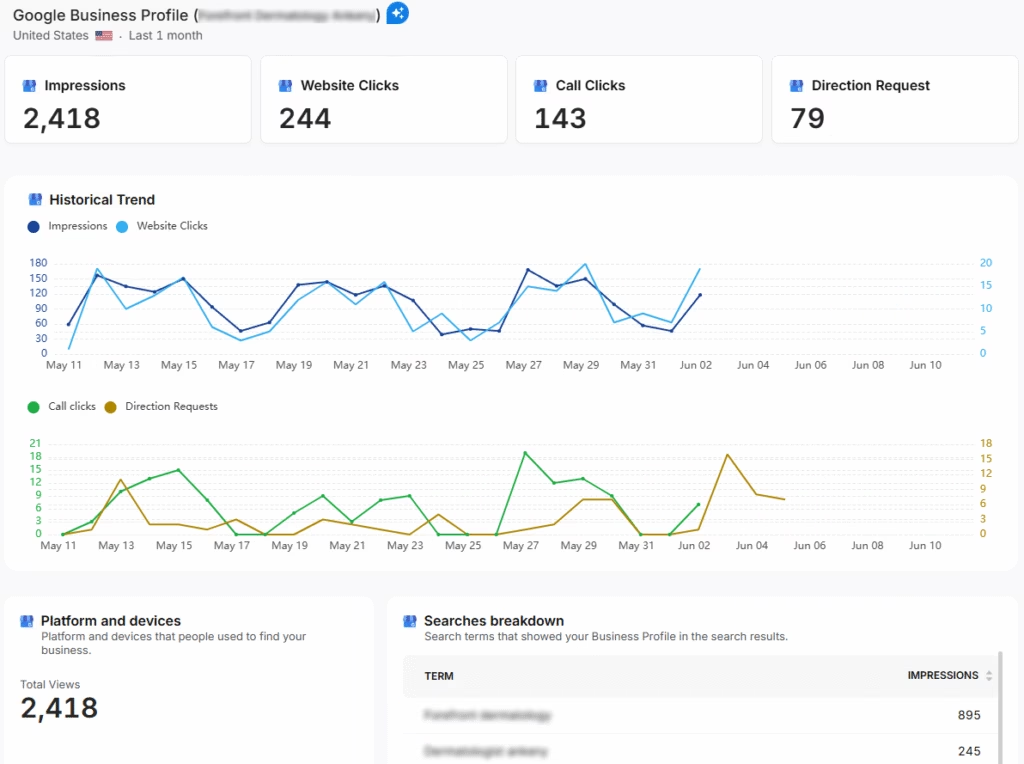
Click on Edit Report and navigate to the Local SEO and GBP Section. Add as many Local SEO projects and GBP accounts as needed for the report.
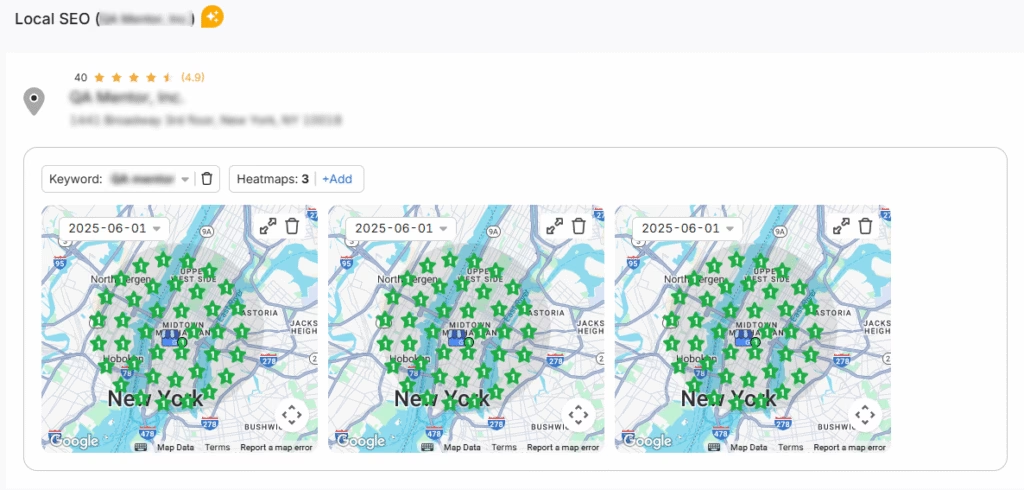
The previously configured heatmap for each Local SEO project will be automatically included. They are fully customizable.
The GPB data will also be added automatically, and each metric can be adjusted as needed.
Sharing the Report
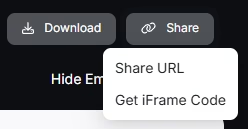
Once your report is configured, you can download it as a PDF or share it via a Share URL or Get iFrame Code.
The iFrame Code is an HTML element that allows you to embed another HTML page within your own.
White Label Reporting
Search Atlas enables you to completely white-label your dashboard and URL.
Go to Agency White Label and set your custom dashboard URL and logo.
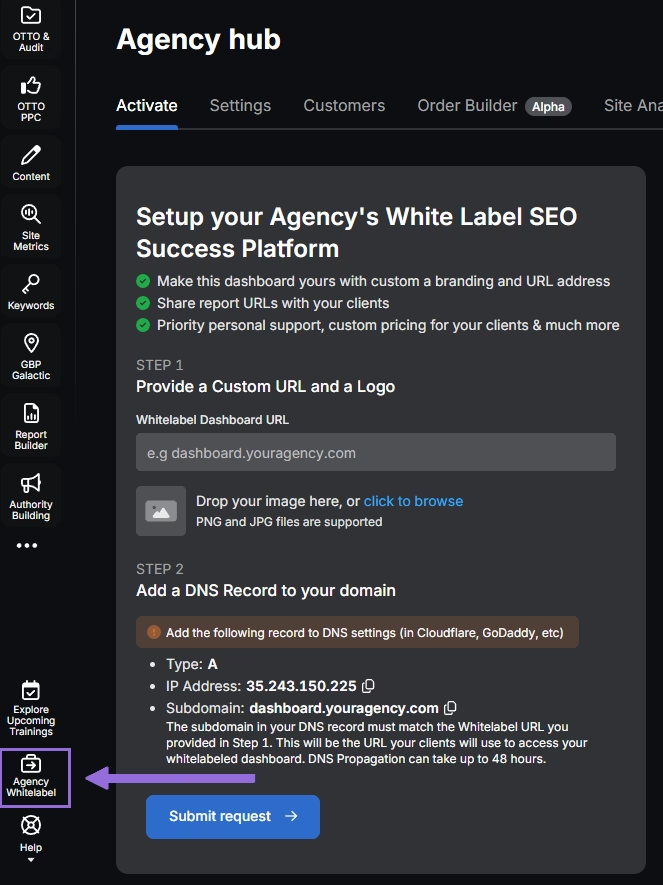
When you share your report via Shareable URL, it will display your logo and URL.
8. How to Use Search Atlas Onboarding Process?
Search Atlas offers multiple support channels to help you with the migration process and any other questions. Here is how to make the most of our onboarding process.
Watch Tutorial Videos
Search Atlas offers step-by-step tutorials on YouTube to help you set up reports, dashboards, and automations.
Book a 1:1 Onboarding Session
During your trial, you can schedule a 1:1 onboarding session directly from the dashboard. A product expert will help you customize your setup, connect integrations, and configure OTTO for automation.
Follow the 7-Day Email Campaign
As soon as you start your free trial, you’ll receive a 7-day onboarding email sequence. Each email walks you through a core feature.
Technical Documentation
Access full technical docs via the Help Center for detailed instructions on using every feature. Everything is searchable and regularly updated.