Search Atlas offers a unified SEO platform that integrates the core features of Mangools’ suite, including KWFinder, SERPChecker, SERPWatcher, LinkMiner, and SiteProfiler, into one unified SEO platform with a streamlined interface.
While Mangools provides user-friendly tools for specific tasks, Search Atlas enhances the workflow by combining these capabilities with keyword research, AI-powered content creation, automated technical SEO, and comprehensive reporting.
This guide shows you how to adapt your Mangools workflows to the more advanced and integrated tools in Search Atlas to maximize your efficiency and achieve better results.
1. What Is the Initial Setup in Search Atlas?
Start by configuring your workspace properly to enable seamless tracking, automation, and performance insights.
Create a New Project
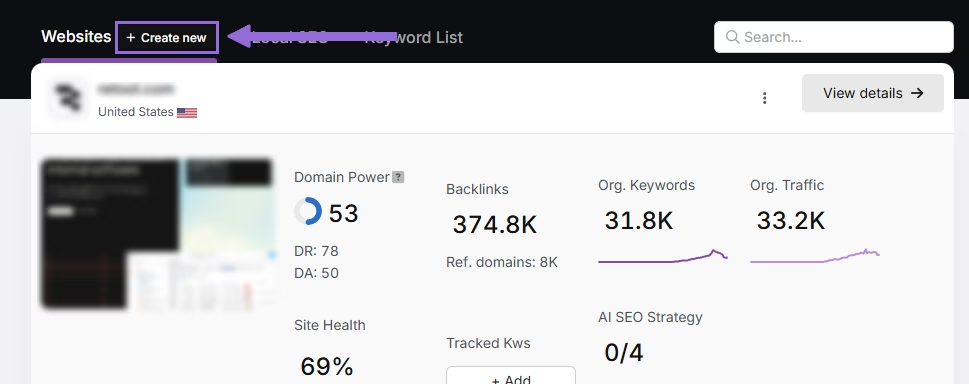
Log in to your Search Atlas account, scroll down in the main Dashboard, and click + Create new.
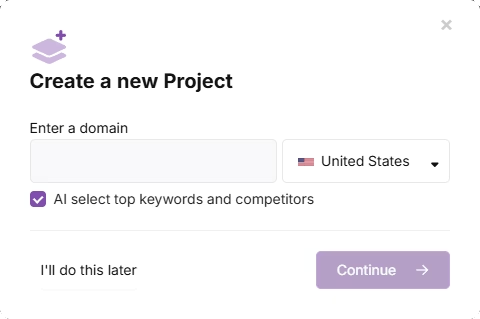
Enter your domain, select the target country, and optionally enter primary keywords for tracking.
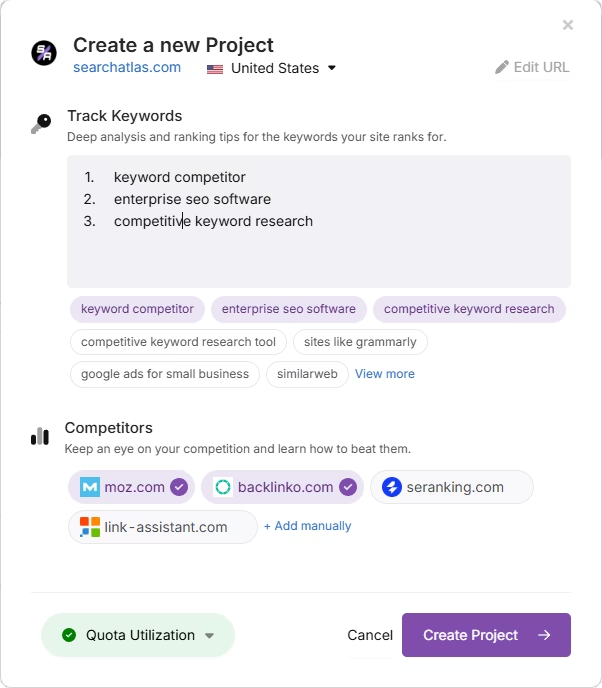
Add or remove recommended keywords and also add your main competitors. You will be able to change both of these options later.
Connect Key Integrations
Google Search Console (GSC)
Click on Site Metrics > All Sites > Connect GSC Account.
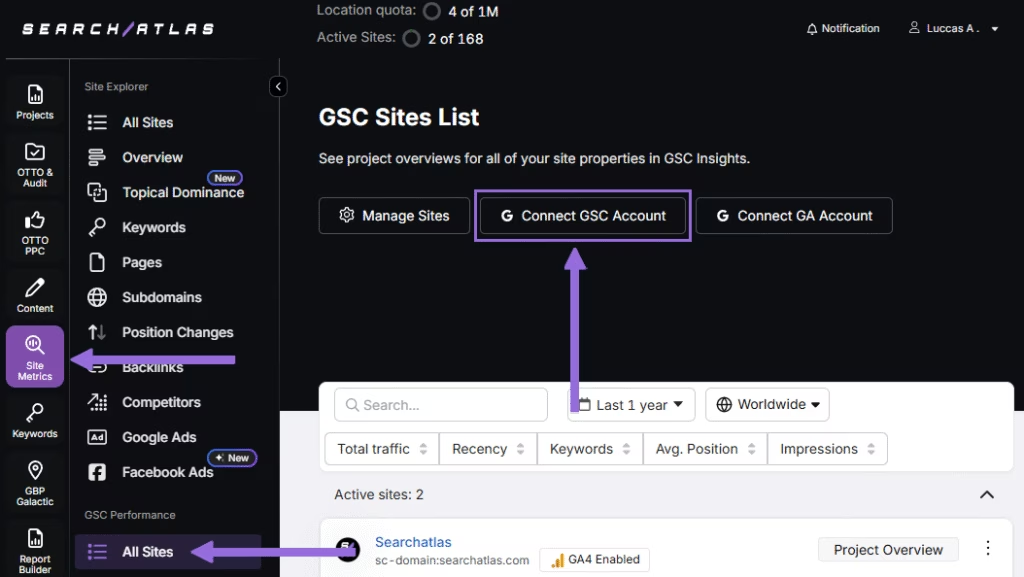
Authorize access and connect your verified property.
After GSC is connected, go to Manage Sites.
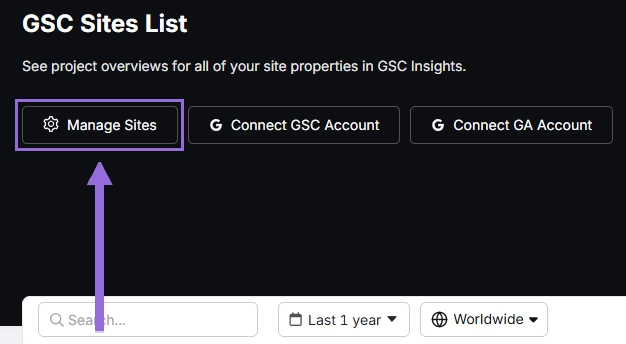
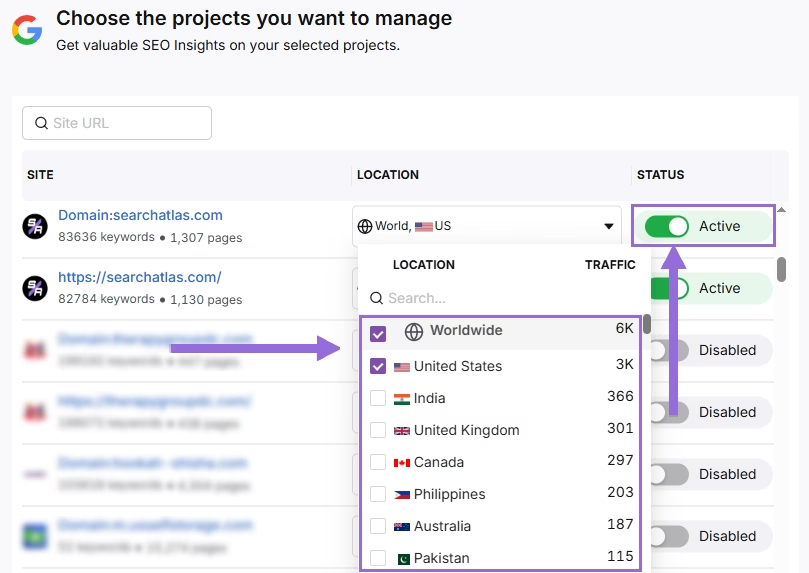
A slider will appear showing all imported GSC properties (they are disabled by default). Find your domain and then click Enable.
Google Analytics 4 (GA4)
From your GSC Performance dashboard, click on Connect Google Analytics 4.

Select your GA property or connect your GA4 account. Authorize access and connect your verified property.
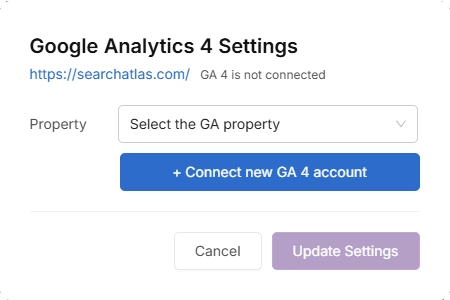
Once enabled, Search Atlas will link keyword data, impressions, CTR, and engagement metrics automatically.
You can use publicly shareable links for fast access to verification if needed.
2. How to Migrate Your Rank Tracking from SERPWatcher to Search Atlas?
This step is quick and simple: Copy all of your tracked keywords from SERPWatcher and import them directly into Search Atlas.
From Mangools (SERPWatcher)
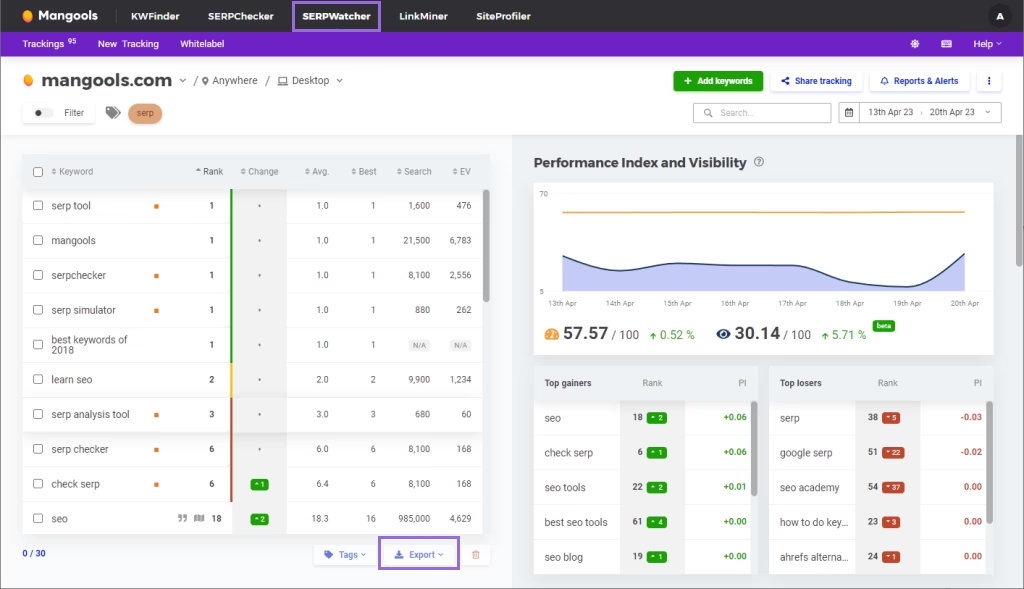
Open your tracking project in SERPWatcher.
Select the tracked keywords you want to migrate.
Click Export and choose Export to CSV to download your tracked keywords.
In Search Atlas
Go to Keywords > Keyword Rank Tracker
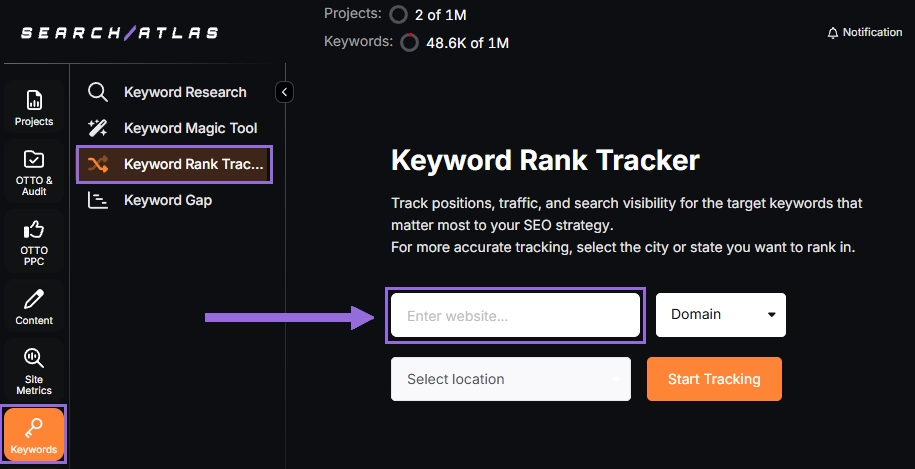
Enter your domain or target page, specify the target location (country, state, city, county, or province).
Example: Track rankings for searchatlas.com in Las Vegas, Nevada
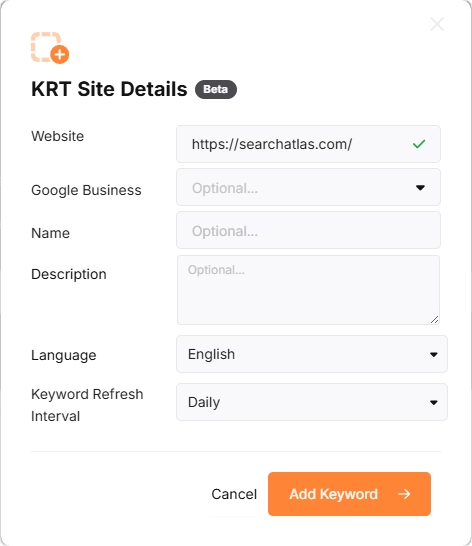
Click Start Tracking and connect your Google Business Profile (GBP), if applicable. Enter the name of your project, description, language, and keyword refresh interval (Daily, Weekly, Monthly, or Custom).
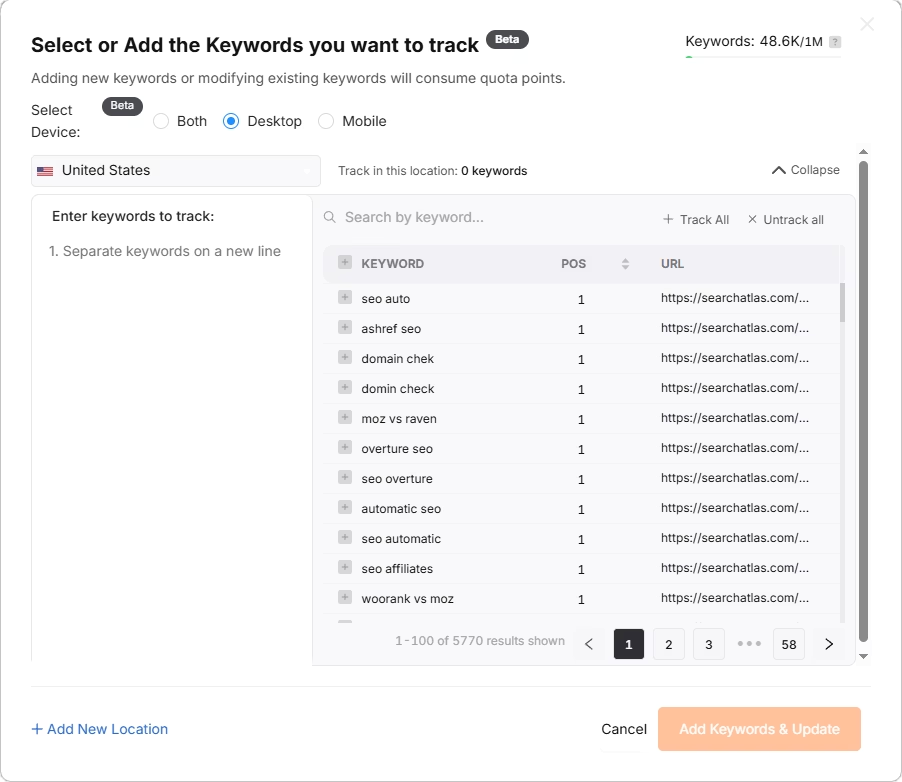
Search Atlas will automatically recommend keywords, and you can choose between selecting them or pasting keywords manually from the Ahrefs CSV.
3. How to Set Up Search Atlas’s Site Auditor?
Mangool’s doesn’t offer a site auditor tool like Search Atlas Site Auditor.
In Search Atlas
Set Up a Site Audit in Search Atlas
Go OTTO & Audit > All Audits > Site Auditor.
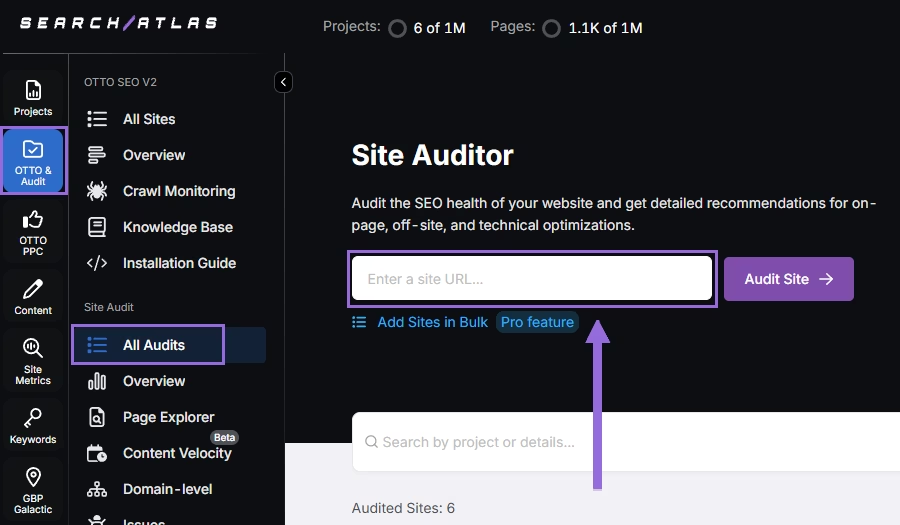
Enter your domain and configure the crawling features:
Configure crawling with the following options:
- User agent (use Search Atlas bot recommends for best accuracy)
- Number of pages to crawl (default is 100)
- Adjust crawl speed (default is 20 pages per second)
- Set crawl frequency (default is every 7 days)
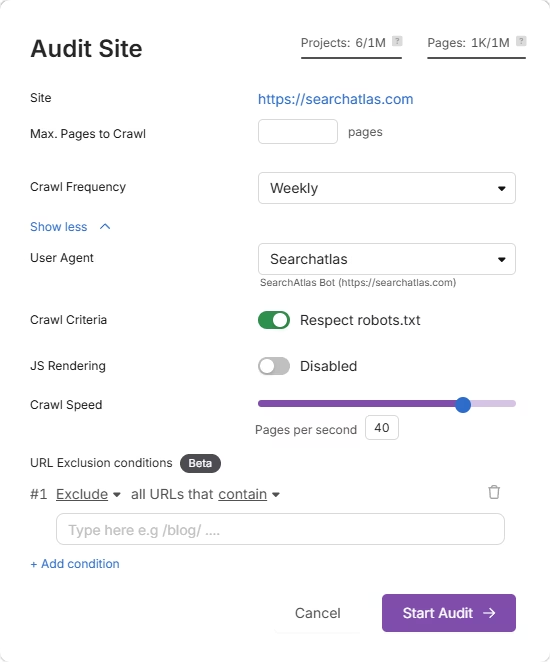
Run a full scan to launch the crawl across all pages under that domain.
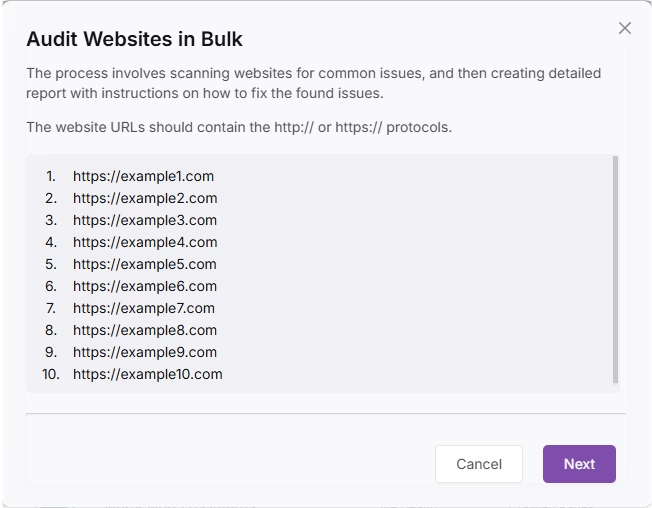
Pro Plan Feature – Bulk Auditing
For agencies or multi-site audits, go to Update Sites in Bulk and paste multiple domains to queue audits simultaneously.
This is ideal for auditing multiple projects quickly.
4. How to Set Up Reports in Search Atlas?
Mangools does not include a centralized tool like Search Atlas’s advanced Report Builder for creating comprehensive and automated reports.
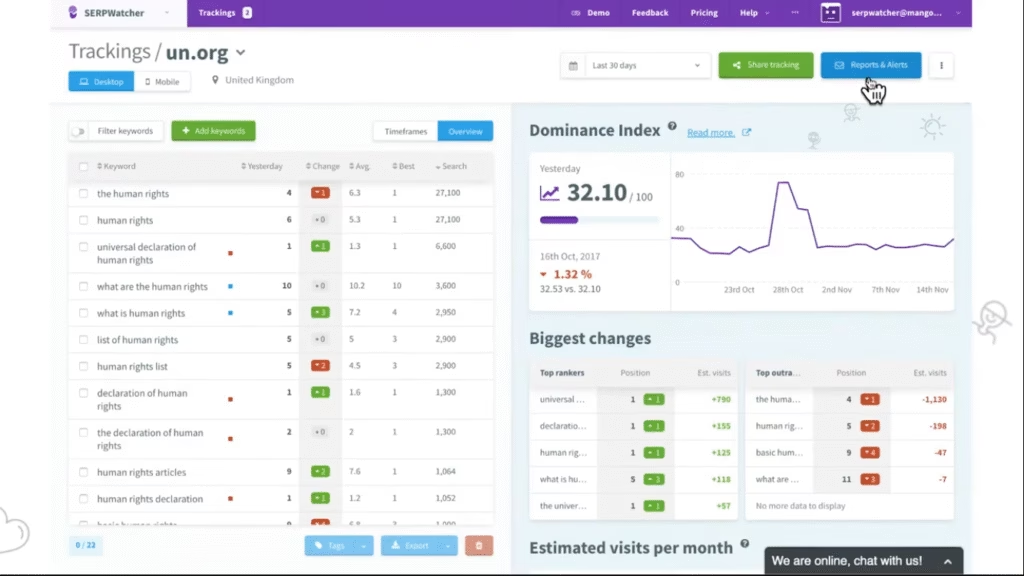
From Mangools
Go to Dashboard > SERPWatcher > Your Project
Click on Reports & Alerts, create your report profile, and download it.
In Search Atlas
Go to Report Builder > Report List
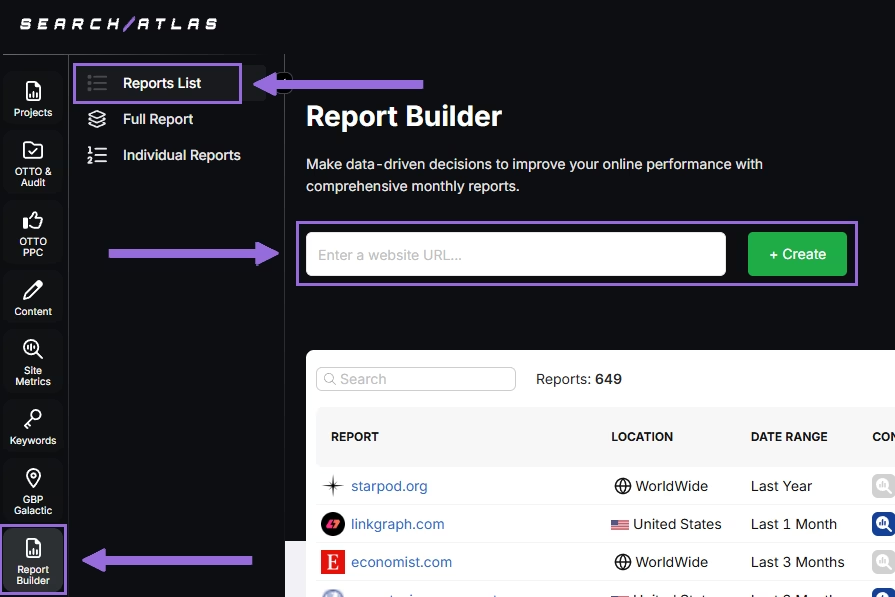
Choose the location, date range, and the widgets you want to report, like:
- AI Summaries
- Site Explorer
- OTTO SEO
- Orders & Tasks
- Google Analytics data
- Google Search Console data
- Facebook Ads
- Google Ads
- Google Business Profile
- Keyword Rank Tracking
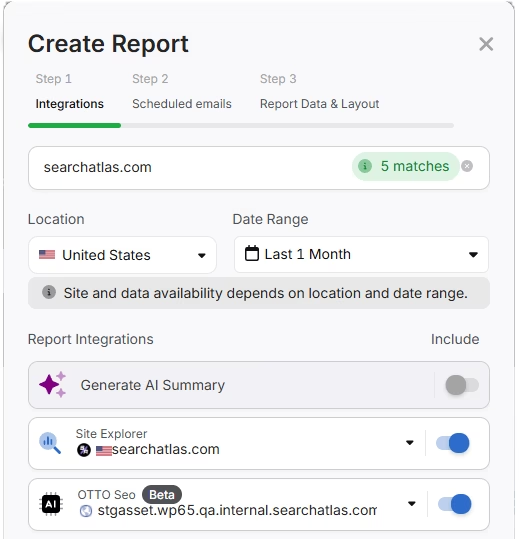
Next, schedule the automated reporting by adding recipients, selecting the email frequency (weekly, monthly, or quarterly), and choosing what day of the week the report will be sent.
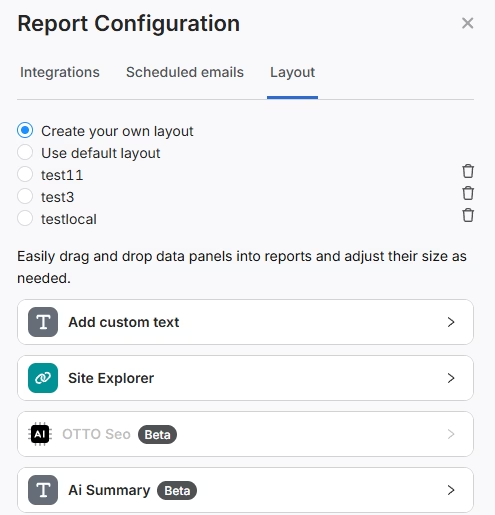
Choose between Default Layout and Custom Layout, and create the report.
Customize the Reporting
After creating the report, click Configure Report to change the Integrations, Scheduled emails, and Layout.
In Layout you can fully customize the report.
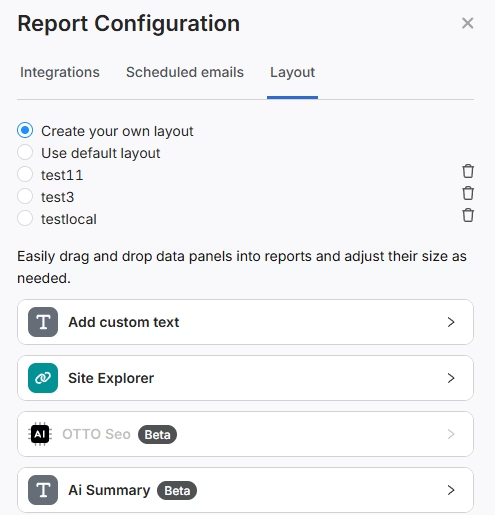
Click Add custom text to add your own text or HTML, enabling you to add your branding like logo, banner, and even links.

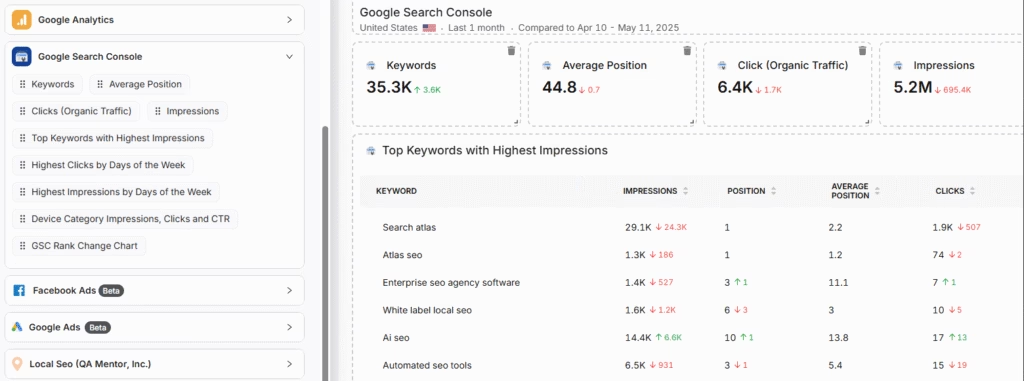
Scroll down and click and drag each metric to the report. You are free to choose any place to add the report.
Add the AI Summaries
In the Integrations, you can add the AI Summary Overview.
These are automated overviews that quickly highlight the key points of your report, making it much easier for both you and your clients to understand the results.

White Label Reporting
Search Atlas enables you to completely white-label your dashboard and URL.
Go to Agency White Label and set your custom dashboard URL and logo.
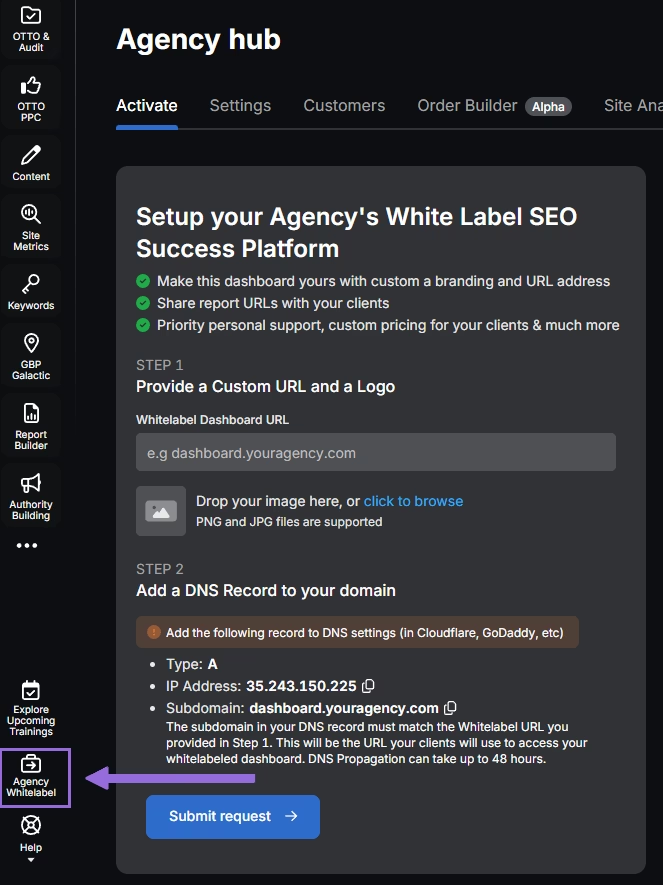
When you share your report via Shareable URL, it will display your logo and URL.
5. How to Enable Automated SEO Optimization in Search Atlas?
Ahrefs doesn’t offer an AI SEO agent.
With Search Atlas, you can set up OTTO SEO, the AI agent that automates nearly every SEO task, including technical audits, on-page optimization, link building, content creation and optimization, Local SEO and GBP optimization, and more.
Obs: It’s necessary to go through the Site Audit on your project before activating OTTO.
Go to Projects > + Add a Website
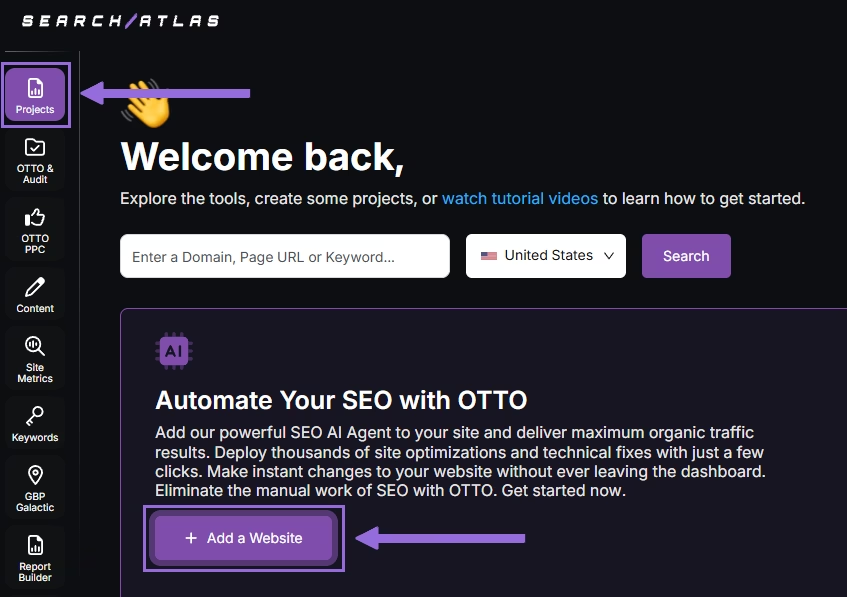
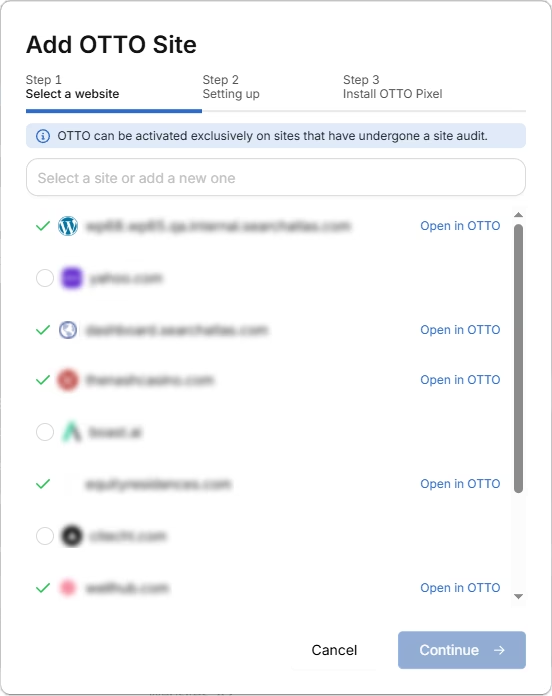
Select one of your projects that doesn’t have OTTO installed, or add a new website.
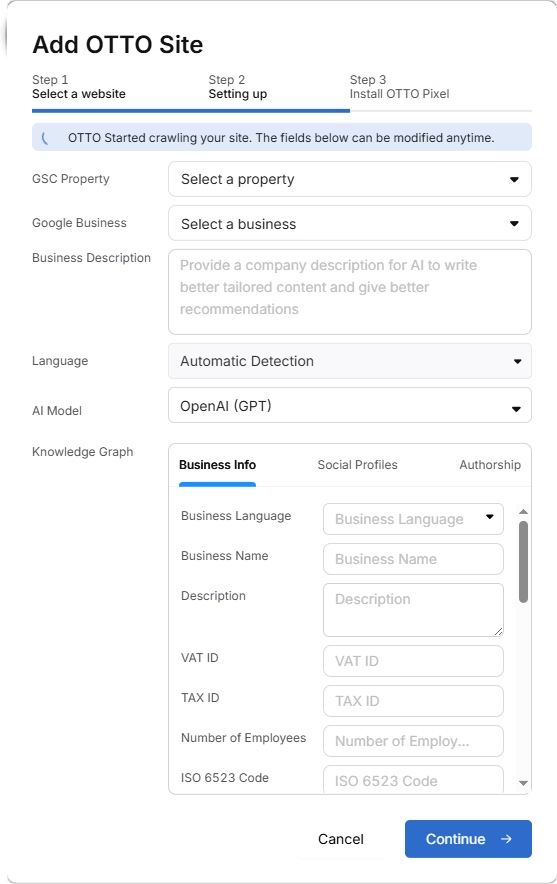
Select the GSC and GBP, and add the details about your business.
Next, proceed with the tutorial to install OTTO.
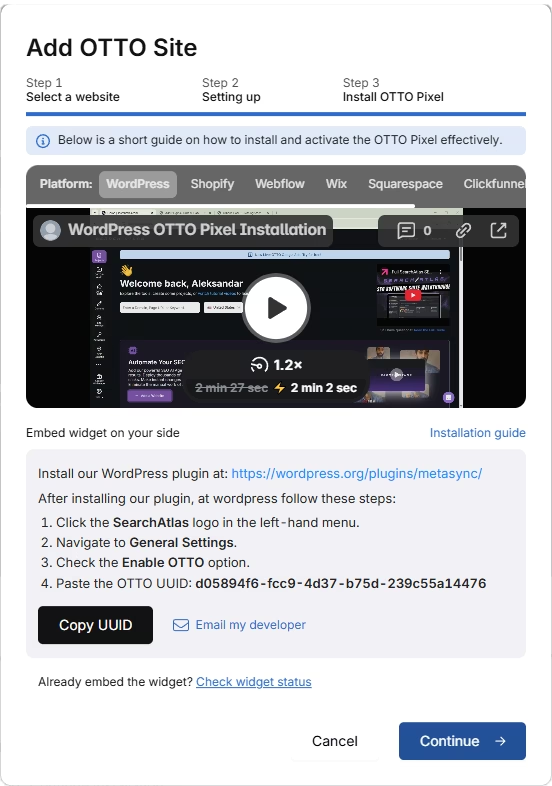
Installing OTTO on another CMS
Go to OTTO & Projects > Installation Guide. You will find short tutorial for:
- Google Tag Manager
- WordPress
- Shopify
- Webflow
- Squarespace
- ClickFunnels
- Wix
- GoHighLevel (GHL)
- Custom Installation
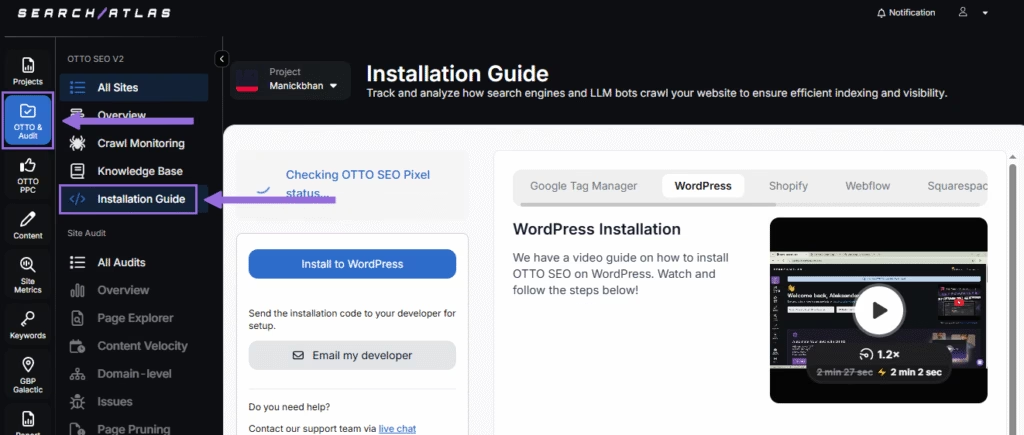
Here is a quick recap on how to install OTTO SEO on WordPress.
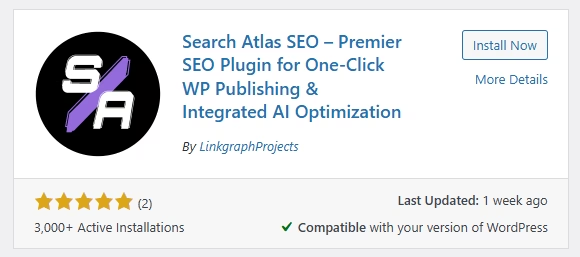
Go to your WordPress dashboard. Open the Plugins section. Search for “Search Atlas” in the plugin directory. Click Install Now, then activate the plugin.
Copy the API key provided during setup. Open the Search Atlas plugin settings by clicking the Search Atlas logo in the left-hand menu. Navigate to General Settings. Paste the API key into the Search Atlas API Key field and continue.
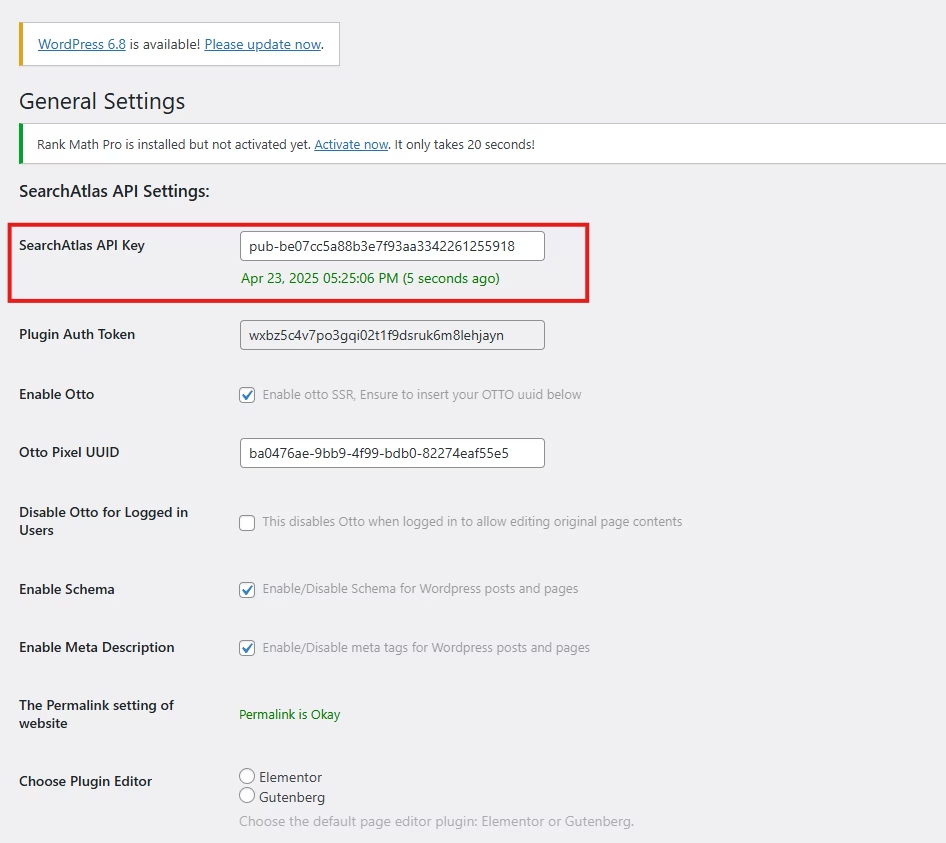
Copy the code provided in the next step. Return to your WordPress dashboard. Access the plugin settings again. In General Settings, check the Enable OTTO box. Paste the code into the OTTO Pixel UUID field. Save changes.
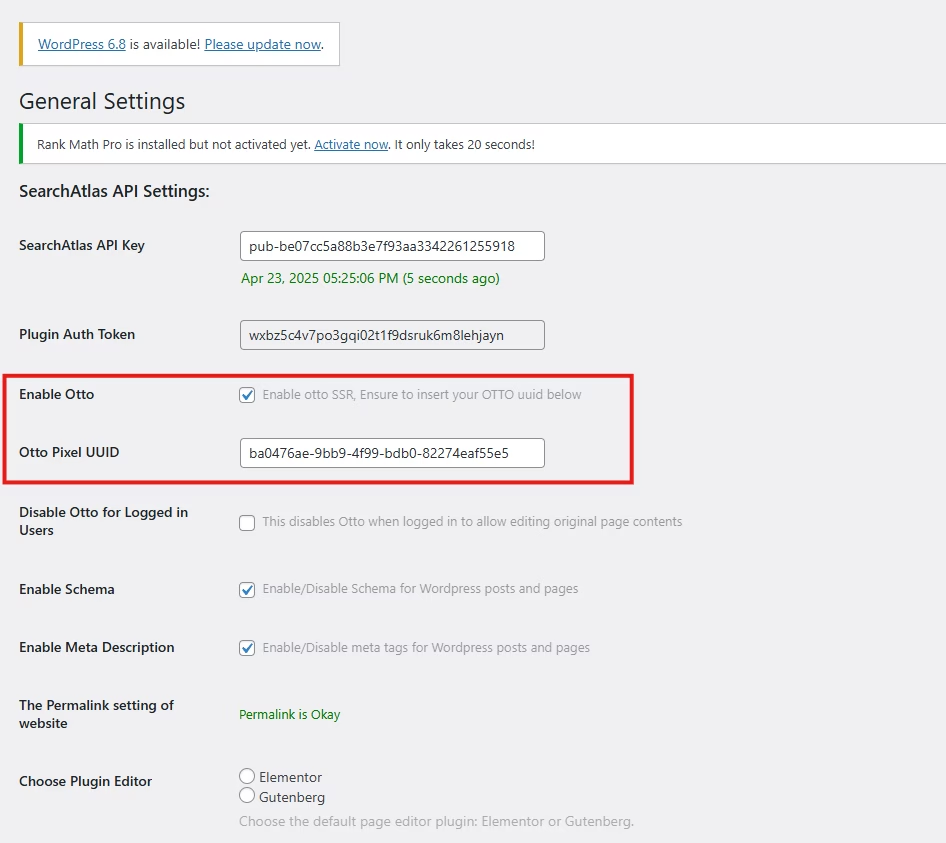
OTTO SEO now runs inside WordPress, automating fixes and SEO updates across your site.
How to Configure OTTO SEO?
Here is a quick tutorial on how to configure OTTO Autopilot and settings.
6. How to Leverage Search Atlas Onboarding Process?
Search Atlas offers multiple support channels to help you with any question or issue. Here is how to make the most of our onboarding process.
Watch Tutorial Videos
Search Atlas offers step-by-step tutorials on YouTube to help you set up reports, dashboards, and automations.
Book a 1:1 Onboarding Session
During your trial, you can schedule a 1:1 onboarding session directly from the dashboard. A product expert will help you customize your setup, connect integrations, and configure OTTO SEO for automation.
Follow the 7-Day Email Campaign
As soon as you start your free trial, you’ll receive a 7-day onboarding email sequence. Each email walks you through a core feature.
Technical Documentation
Access full technical docs via the Help Center for detailed instructions on using ev


